


Here’s a more comprehensible version of the content about QuickBooks Error 1904 during QuickBooks Desktop installation:
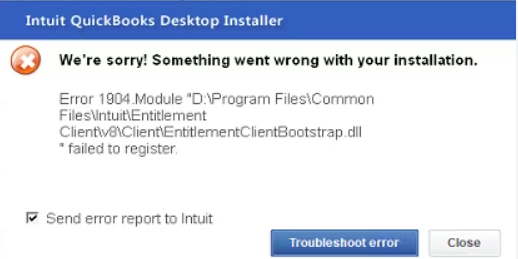
Gain a thorough understanding of how to resolve QuickBooks Error code 1904 during the installation of QuickBooks Desktop. This error often surfaces when users attempt to install QuickBooks files and is frequently due to insufficient system maintenance. Specifically, QuickBooks Error 1904 presents as ‘Failed to register’, followed by the relevant file path, name, or extension, such as “Error 1904: [file path / name / extension] failed to register.”
This error might also occur during QuickBooks Desktop installation following an upgrade of the operating system, for example from Windows Vista to Windows 7, particularly if the system wasn’t restarted post-upgrade.
If you encounter multiple error messages on your screen specifically mentioning ICWrapper.dll, qbprefs.dll, RcnFndRequestHandler.dll & qbupdate.exe, among others, then it’s likely that the issue stems from a damaged Microsoft Visual C++ component.
Reasons for Install Message Code QuickBooks Error 1904
here are some potential reasons why you might be experiencing the Install Message Code QuickBooks Error 1904 in Desktop:
- Improper Installation of QuickBooks: The error can occur if QuickBooks wasn’t installed correctly, such as if the installation was interrupted or the computer shut down during the process.
- Windows Updates Required: If your Windows operating system isn’t updated, it might not be compatible with the version of QuickBooks you’re trying to install.
- Damaged Microsoft .NET Framework: QuickBooks relies on Microsoft .NET Framework. If this system is damaged or corrupted, it can cause errors during QuickBooks installation.
- Outdated QuickBooks: An older version of QuickBooks might not be compatible with your operating system, causing the error.
- Insufficient User Permissions: If the user doesn’t have the required administrative permissions to install applications, this can cause an error.
- Interference from Antivirus Software: Sometimes, your antivirus software might mistake QuickBooks installation files for potential threats, blocking the installation and causing the error.
- Interference from Firewall: A firewall can also block the QuickBooks installation, thinking it’s a potential threat.
- Corrupted QuickBooks Installer File: If the file you’re using to install QuickBooks is corrupted, you might encounter this error.
- Hard Drive Corruption: Errors on your hard drive can interrupt the installation of new software like QuickBooks.
- Corrupted Windows Registry: A corrupted Windows registry from a recent QuickBooks-related software change (install or uninstall) could also cause this error.
- Software Conflict: If another program on your computer is conflicting with QuickBooks, this might cause the error.
- Insufficient System Resources: If your computer doesn’t have enough memory or processing power to handle the QuickBooks installation, this can lead to an error.
- Overloaded Temporary Folders: Your computer’s temporary folders might be overloaded with files, which can interfere with new installations.
- Third-Party Applications: Some third-party applications may conflict with QuickBooks, leading to the error.
- Damaged User Account: If your Windows user account is damaged, it could cause issues with installing QuickBooks.
Related article: How to fix QuickBooks Error 3371 status code 11118
Troubleshooting Steps for QuickBooks Error 1904 Windows 11
Up to this point, you’ve gained insight into QuickBooks Error 1904, its occurrence triggers, and potential causes. Moving forward, let’s explore the troubleshooting steps. I suggest following the sequence outlined below:
Method 1: Run the QuickBooks Install Diagnostic Tool
If you’ve encountered QuickBooks Error 1904 during installation or while using the software, you can follow these steps and use the QuickBooks Install Diagnostic Tool to troubleshoot and resolve the issue:
- Download the QuickBooks Tool Hub from Intuit’s official website. This toolkit is a comprehensive resource and includes the QuickBooks Install Diagnostic Tool, a valuable troubleshooting utility.
- Install the QuickBooks Tool Hub on your computer and then open it.
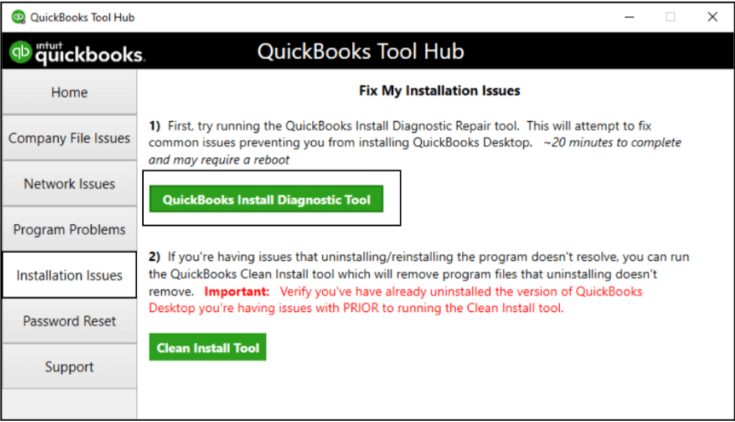
- Within the QuickBooks Tool Hub, navigate to the “Installation Issues” tab. Here, you’ll discover the powerful QuickBooks Install Diagnostic Tool designed to resolve various installation problems, including Error 1904.
- Click on the QuickBooks Install Diagnostic Tool, and it will take charge, automatically detecting and resolving any installation errors, such as Error 1904.
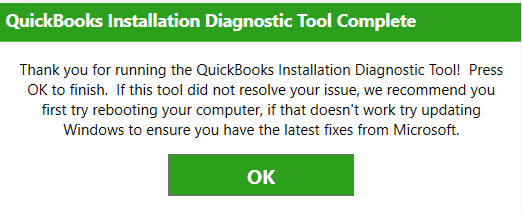
- Once the diagnostic tool has completed its process, restart your computer. This step is crucial to ensure that all components are updated correctly and that any lingering issues have been effectively addressed.
After using the Install Diagnostic tool, you should now be able to fix QuickBooks Error 1904. However, if it still persists, we recommend trying the second method.
Method 2: Update Windows to Fix QuickBooks Error 1904
Sometimes, outdated Windows can cause errors with QuickBooks installation. To update your Windows:
- Click on the “Start” button, then navigate to “Settings.”
- In “Settings,” choose “Update & Security.”
- Under the “Windows Update” section, click “Check for updates.”
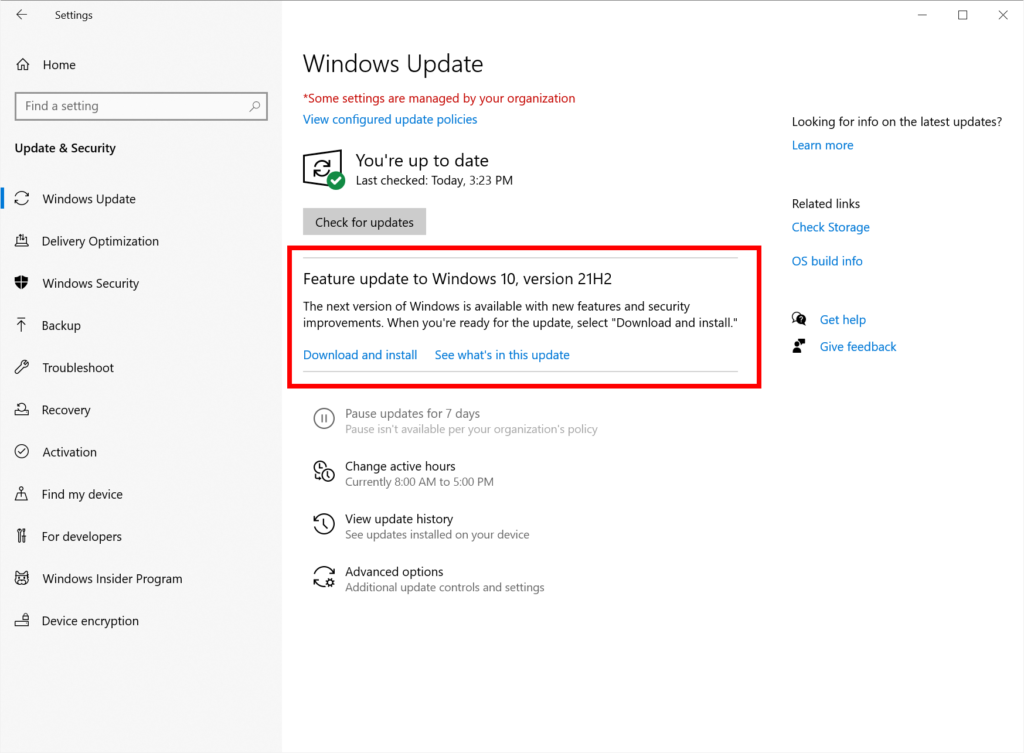
- If there are any updates available, Windows will download and install them automatically. Once the updates are installed, restart your computer.
Method 3: Enabling the Hidden Administrator and Adjusting Installation Settings
1. Access the Hidden Administrator Account:
- Initiate Command Prompt with Admin Rights:
- Press the “Windows” key on your keyboard.
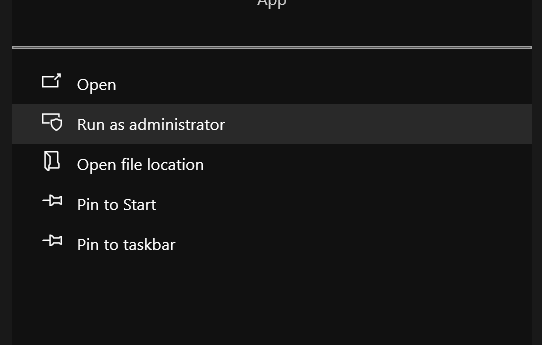
- Type “CMD” into the search. Right-click on “Command Prompt” or “cmd.exe” and select “Run as Administrator.”
- Activate the Administrator Account:
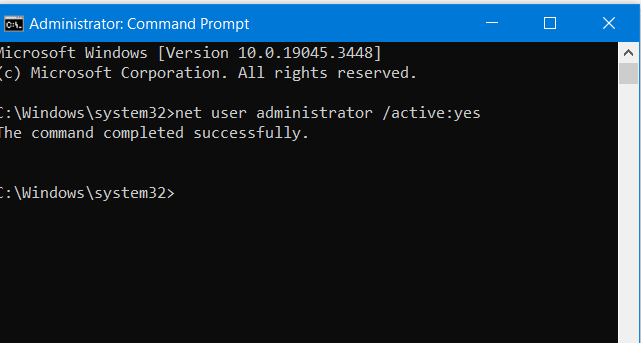
- In the Command Prompt window, type “net user administrator /active:yes” and press “Enter.”
- If an error occurs, try typing “net user administrator /active” and press “Enter.”
2. Switch to the Administrator Account:
- Press “Ctrl+Alt+Delete” simultaneously, then select “Switch User.” For Windows 8 users: Press the “Windows” key and select the user icon at the top-right corner of the screen.
- Use “Ctrl+Alt+Delete” again and select the “default Administrator account” icon.
3. Deactivate the Administrator Account (after use):
- Press the “Windows” key.
- Type “CMD” and right-click on “Command Prompt” or “cmd.exe,” selecting “Run as Administrator.”

- Inside the Command Prompt, type “net user administrator /active:no” and press “Enter.”
4. Modify Installation Folder Security Settings:
- Navigate to “C:\Program Files\Common Files.”
- Right-click on the “Common Files” folder and select “Properties.”
- Under the “Security” tab, click the “Edit” button and then select “Users.”
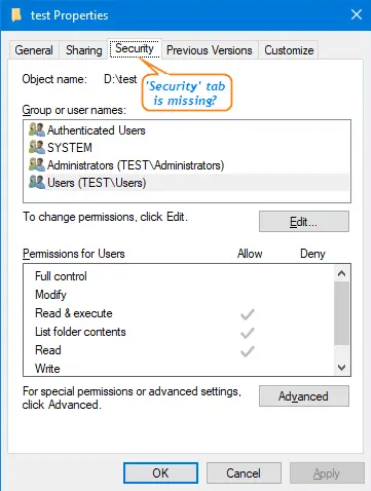
- In the “Permissions for users” section, enable the following permissions:
- Modify
- Read and Execute
- List Folder Contents
- Read
- Write
- Finally, click “Apply” followed by “OK.”
5. Reinstall QuickBooks:
- Install QuickBooks Desktop again.
- After the installation, revert to your original user account.
Important Reminder: If you’ve carefully followed the instructions but continue to encounter errors, it’s recommended to reach out to QuickBooks experts for further assistance.
Method 3: Use the QuickBooks Clean Install Tool
If you’re experiencing problems that cannot be resolved by simply uninstalling and reinstalling the program, you can utilize the QuickBooks Clean Install tool. This tool is designed to eliminate program files that may persist even after a standard uninstallation. Below, we’ve provided a list of steps for efficiently using the clean install tool:
- Download and install the QuickBooks Tool Hub.
- Open the tool hub and select “Installation Issues.”
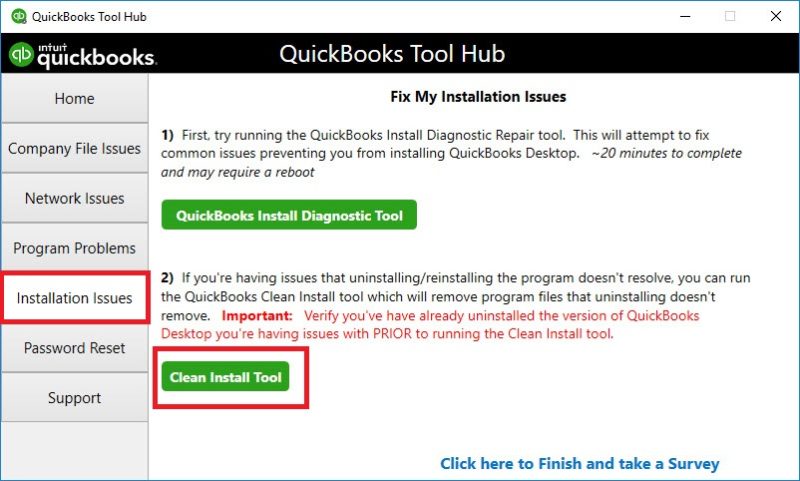
- Choose “Clean Install Tool” and follow the on-screen instructions to uninstall QuickBooks.
- Once QuickBooks is uninstalled, go back to the tool hub and use the “QuickBooks Install Diagnostic Tool” to help with the reinstall process.
Important: Ensure that you have already uninstalled the version of QuickBooks Desktop you’re experiencing issues with BEFORE running the clean install tool. Also, keep your license key and product ID readily available.
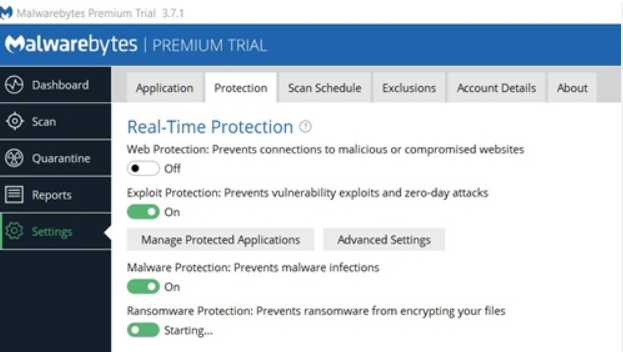
Method 4: Disable Antivirus and Firewall
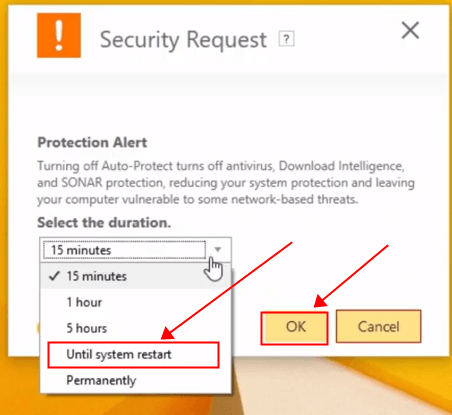
Disabling Your Antivirus Program Temporarily:
- Locate your antivirus icon:
- Look for your antivirus program’s icon in the system tray (usually located at the bottom right corner of your computer screen).
- Right-click on the antivirus icon:
- A context menu should appear after right-clicking.
- Choose to disable the antivirus:
- Depending on the antivirus software you’re using, there should be an option that says “Disable,” “Turn off,” or something similar. Click on it.
- Select the duration:
- Some antivirus programs allow you to choose how long you want to disable them, like “Disable for 30 minutes,” “Disable until restart,” etc. Select the option that fits your needs.
Turning Off Microsoft Defender Firewall:
- Access the Start Menu: Click on the “Start” button (often represented by the Windows logo) located at the bottom left corner of your screen.
- Navigate to Settings: In the Start Menu, click on “Settings” (usually represented by a gear/cogwheel icon).
- Go to ‘Update & Security’: Once inside the Settings window, look for the “Update & Security” option and click on it.
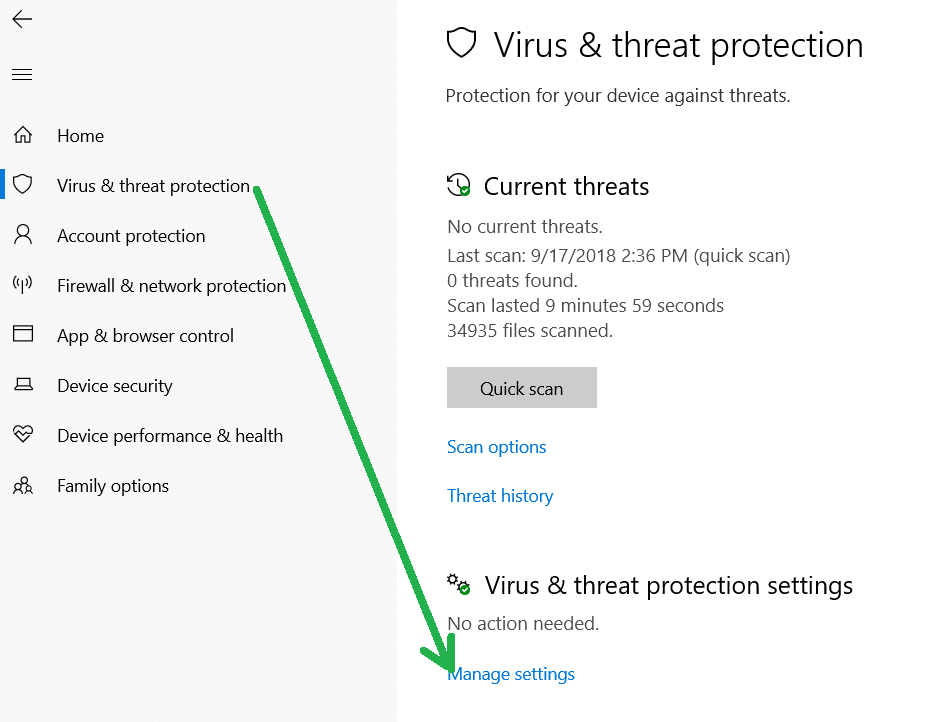
- Select ‘Windows Security’: In the left-hand pane, you’ll find various options. Choose “Windows Security.”
- Access ‘Firewall & network protection’: Now, in the main pane, look for and click on “Firewall & network protection.“
- Choose the relevant network profile: Depending on your connection, you might see options like “Public Network,” “Private Network,” or “Domain Network.” Select the network profile that’s currently active or the one you want to configure.
- Disable Microsoft Defender Firewall: Under the chosen network profile, you’ll see an option that says “Microsoft Defender Firewall.” There should be a switch or button to turn it off. Click on that switch/button to disable the firewall.
Note: Disabling your antivirus or firewall can expose your computer to potential threats. It’s important to turn them back on as soon as you’re done with tasks that require their temporary deactivation. Always ensure you’re downloading or accessing trusted content when these protections are off.
Method 5: Install QuickBooks as an Administrator
To ensure a smooth installation of QuickBooks, it’s crucial to run the installation process with administrator privileges. This approach grants the program the necessary permissions to access system files and settings it needs to function correctly. Here are the steps to install QuickBooks as an administrator:
- Prepare for Installation:
- Before starting, ensure you have the QuickBooks installation file ready. If you haven’t downloaded it yet, visit the official QuickBooks website and download the appropriate version for your system.
- Also, make sure you’re logged into your computer as a user with administrative privileges.
- Locate the Installation File:
- Find the QuickBooks installer file on your computer. It typically has a .exe extension (for example, ‘QuickBooksPro2023.exe’).
- Run as Administrator:
- Right-click on the QuickBooks installation file.
- From the context menu, select ‘Run as administrator.’ This option allows the installation to proceed with administrative rights, ensuring that it has access to necessary system resources.
- If prompted by a User Account Control (UAC) dialog asking if you want to allow the app to make changes to your device, click ‘Yes.’
- Follow the Installation Wizard:
- The QuickBooks installation wizard will launch. Follow the on-screen instructions.
- You’ll be asked to agree to the software license agreement. Read and accept it to continue.
- Proceed to choose the type of installation (Typical or Custom). For most users, ‘Typical’ is recommended.
- Continue following the prompts, entering relevant information like the product and license numbers.
- Complete the Installation:
- The wizard will then install QuickBooks on your computer. This process may take some time, depending on your system’s performance.
- Once the installation is complete, click ‘Finish.’
- Restart Your Computer (Optional):
- After installation, it’s a good practice to restart your computer. This ensures that all components of QuickBooks are correctly initialized.
- Open QuickBooks:
- After restarting, locate the QuickBooks icon on your desktop or in your start menu.
- Run QuickBooks, ideally also using ‘Run as administrator’ the first time to set up any additional components.
By following these steps, you install QuickBooks with administrative privileges, which is often essential for proper installation and functioning of the software, especially in environments with strict user access controls.
Method 6: Repair Microsoft .NET Framework
Here is a simplified list of steps to repair the Microsoft .NET Framework, which is often necessary for resolving various issues with QuickBooks:
- Close All Running Programs: Ensure all applications, including QuickBooks, are closed.
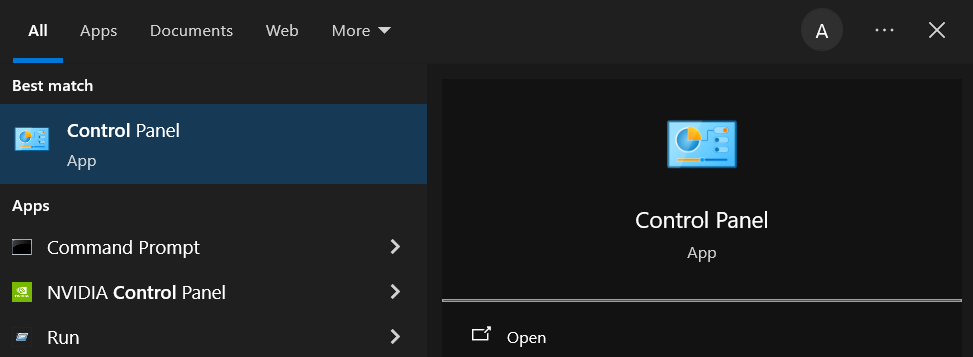
- Open the Windows Control Panel: You can do this by typing “Control Panel” in the Windows search bar and selecting it.
- Navigate to Programs and Features: Click on “Programs” and then “Programs and Features.”
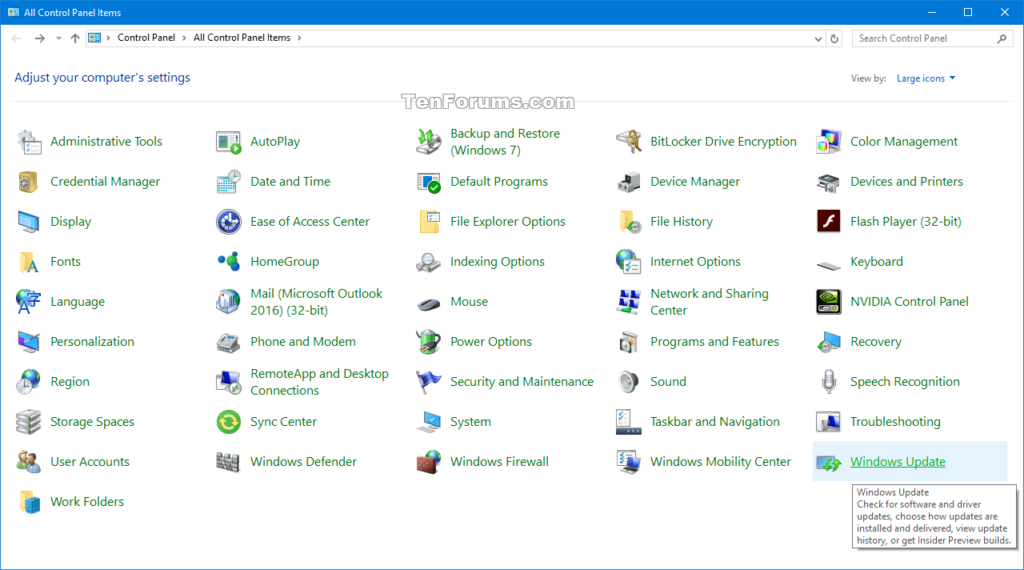
- Find Microsoft .NET Framework: Scroll through the list to find the Microsoft .NET Framework.
- Uninstall/Repair Option: Click on the Microsoft .NET Framework, then choose “Uninstall/Change.”
- Select Repair: Follow the prompts and choose the Repair option. The system will begin the repair process.
- Follow On-Screen Instructions: Complete the process by following any additional on-screen instructions.
- Restart Your Computer: Once the repair is complete, restart your computer to ensure changes take effect.
- Reopen QuickBooks: After the system restarts, try opening QuickBooks to see if the issue is resolved.
Method 7: Check User Permissions
Ensure that your user account has the necessary permissions to install QuickBooks:
- Navigate to the Control Panel and click on “User Accounts.”
- Select the account you’re using and check if it has administrative rights.
- If not, either switch to an account that has administrator privileges or change your account type to “Administrator.” You’ll need an Administrator password to do this.
Method 8: Clean up Temporary Files
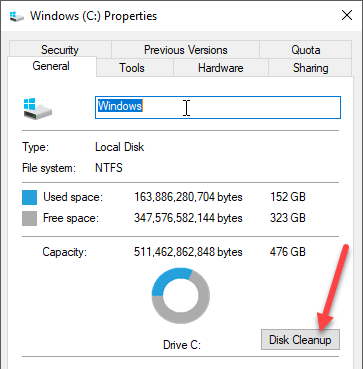
Cleaning temporary (temp) files can help resolve installation issues. Here’s how:
- Press “Windows + R” to open the Run command.
- Type “%temp%” and press “Enter.”
- A folder containing temporary files will open. Press “Ctrl + A” to select all files and then “Delete.”
Perform a System Restore
If none of the methods above resolve the issue, consider performing a system restore to return your computer to a state where QuickBooks was working without issues.
- Search for “System Restore” in the Windows search bar and select it.
- Click “Next” on the window that appears. You’ll see a list of restore points with dates. Choose a date when QuickBooks was functioning correctly and click “Next.”
- Follow the prompts to complete the system restore. This action won’t affect your personal files, but it might uninstall recent software and drivers.
Fix QuickBooks error 1904 on Mac
Method 1: Verify system requirements
- Ensure that your Mac meets the minimum system requirements to run QuickBooks.
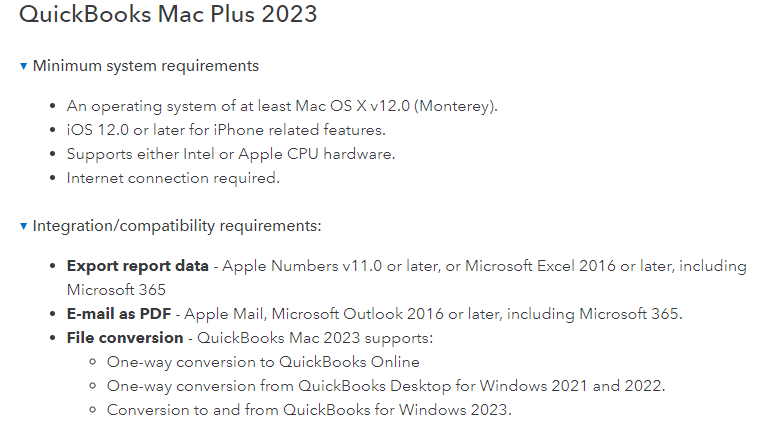
- Check the compatibility of your operating system version with the QuickBooks version you are using.
Method 2: Run the QuickBooks Install Diagnostic Tool and fix QuickBooks error 1904
- Download and install the QuickBooks Install Diagnostic Tool from the official Intuit website.
- Run the tool and let it scan your Mac for any installation issues or errors.
- Follow the on-screen instructions provided by the tool to resolve any identified issues.
Method 3: Adjust security settings
- Open the “System Preferences” on your Mac.
- Navigate to the “Security & Privacy” settings.
- In the “Privacy” tab, select “Full Disk Access” from the left sidebar.
- Click on the lock icon at the bottom of the window and enter your administrator password to make changes.
- Check if QuickBooks is listed in the applications that allowed full disk access. If not, add it by clicking the “+” button and selecting QuickBooks.
Method 4: Create a new user account and test QuickBooks error 1904
- Go to the “Apple” menu and choose “System Preferences.”
- Select “Users & Groups” or “Users & Accounts.”
- Click on the “+” button to create a new user account.
- Set up the account as an administrator and provide a name and password.
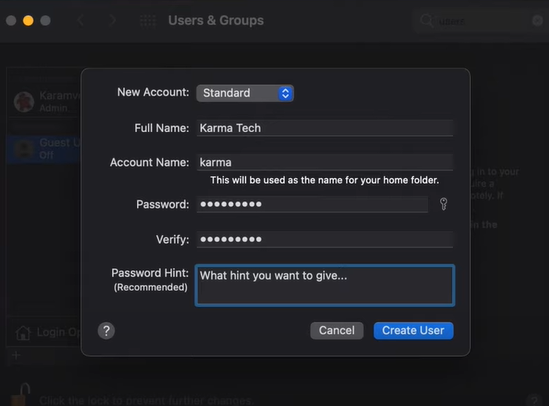
- Log out of your current account and log in with the newly created user account.
- Install and run QuickBooks in the new user account to check if the error persists.
Method 5: Remove conflicting applications
- Identify any third-party applications that might conflict with QuickBooks.
- Check if any antivirus, firewall, or security software is interfering with QuickBooks installation.
- Temporarily disable or uninstall such applications and try installing QuickBooks again.
Method 6: Repair QuickBooks installation
- Close QuickBooks and navigate to the “Applications” folder on your Mac.
- Locate the QuickBooks application and right-click on it, then choose “Get Info.”
- In the Info window, check the box next to “Locked” to prevent any changes to the application.
- Open the QuickBooks application and go to the “File” menu, then select “Utilities” and “Repair QuickBooks.”
Method 7: Update QuickBooks and remove QuickBooks error 1904
- Make sure you have the latest version of QuickBooks installed on your Mac.
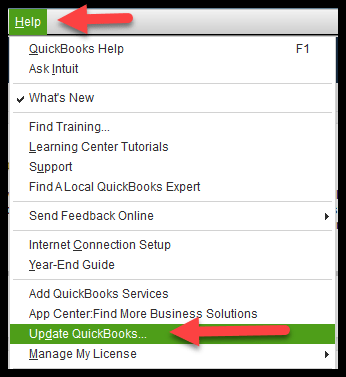
- Update QuickBooks to the latest release by going to the “Help” menu and selecting “Update QuickBooks.”
Remember, these actions may require advanced knowledge of your computer’s operating system. If you’re uncomfortable performing these steps, please consult with an IT professional or reach out to QuickBooks support for further assistance.
Taking everything into account
Well, it looks like you’ve tried everything, but you’re still seeing that “Installation message code QuickBooks error 1904 failed to register“. This might mean there’s something wrong with your Windows system. But don’t worry, we’re here to help! You can call our QB Data Recovery Services Support Team. One of our Desktop experts will look into this Error code 1904in QuickBooks Desktop for you and help you fix it in no time.
FAQ
Q1: What is Error 1904 when installing QuickBooks?
A: Error 1904 usually occurs when you are installing QuickBooks Desktop and a component fails to register with your Windows operating system. This is generally due to file damage or an incorrect file setting.
Q2: What is the module failed to register error (ICWrapper.dll, for example) in QuickBooks?
A: The “Module Failed to Register” error occurs when a DLL file (like ICWrapper.dll) does not register correctly during the installation process. This could be due to file corruption or incompatible software.
Q3: How can I fix Error 1904 in QuickBooks?
A: To fix QuickBooks Error 1904, try running the QuickBooks Install Diagnostic tool. If that doesn’t work, you may need to adjust your Windows permissions or reinstall QuickBooks.
Q4: Why do I get an Error 1904 message when logging into QuickBooks?
A: An QuickBooks Error 1904 message during login often indicates a corrupted QuickBooks file. You may need to repair or reinstall QuickBooks to resolve the issue.
Q5: What does QuickBooks Error 1904: ICWrapper.dll failed to register mean?
A: This error suggests that the ICWrapper.dll file did not register correctly during QuickBooks installation. You may need to run the QuickBooks Install Diagnostic tool or reinstall QuickBooks to fix this issue.
Q6: How can I fix a QuickBooks 2017 installation error 1904?
A: For a QuickBooks 2017 installation error 1904, consider running the QuickBooks Install Diagnostic tool. If that doesn’t solve the issue, reinstalling QuickBooks 2017 or updating your Windows permissions might be necessary.
Q7: What should I do if I encounter a QuickBooks 2023 error 1904?
A: If you come across error 1904 while installing QuickBooks 2019, run the QuickBooks Install Diagnostic tool. If the error persists, adjusting your Windows permissions or reinstalling QuickBooks 2023 may be required.
Q8: How can I fix a QuickBooks installation error 1904 failed to register?
A: To fix this error, you can try running the QuickBooks Install Diagnostic tool. If that doesn’t work, consider adjusting your Windows permissions or reinstalling QuickBooks.
Q9: Why do I see the “We’re sorry! Something went wrong with your installation” error during QuickBooks installation?
A: This error typically indicates that there was an issue with your QuickBooks installation, such as a corrupted installation file or issues with your Windows operating system. You may need to redownload the QuickBooks installation file or check your Windows settings to fix this.
Q10: What is QuickBooks Error Message 1904?
A: QuickBooks Error Message 1904 is a common installation error that occurs when a file fails to register during installation. This can be caused by a damaged file, incorrect file settings, or issues with your Windows operating system.
