
Encountering frequent interruptions while using QuickBooks? The culprit might be the notorious QuickBooks Abort error message, an issue known for causing sudden work disruptions. If you’re grappling with this error, there’s no need for concern. Our guide is here to walk you through understanding and resolving the QuickBooks Abort Error, ensuring your work proceeds smoothly without any unexpected pauses.
What is QuickBooks keeps Aborting Error?
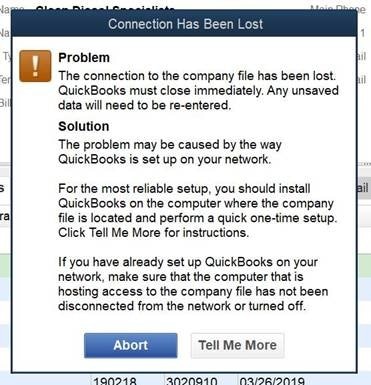
The QuickBooks Abort Error is a widespread problem that many users face. It manifests as a sudden and disruptive message: “QuickBooks abort error Problem. The connection to the company file has been aborted. QuickBooks must close immediately. Any unsaved data will need to be re-entered.” If this scenario sounds familiar, you’re certainly not alone. The error’s abruptness can be a significant source of frustration. However, comprehending the root causes of this issue is the first step towards a solution. Let’s delve deeper to unravel the mysteries behind this error and find effective ways to address it.
Why Does QuickBooks Keep Aborting?
The ‘Abort Error Message can arise from various issues in QuickBooks Desktop. Understanding these triggers is crucial for effective troubleshooting. Here are the common reasons leading to this error:
- Interrupted Internet Connection: A disabled or unstable internet connection can disconnect QuickBooks from the company file, frequently resulting in the abort error.
- QBWUSER.INI File Issues: Missing or corrupt QBWUSER.INI files are a known cause for errors in QuickBooks, potentially leading to unexpected abort issues.
- Hardware Malfunctions: Common hardware problems, such as a corrupt or damaged hard drive, can hinder access to the company file on a shared network.
- Software Installation Damage: Any damage or issues in the installation of QuickBooks Desktop and the Windows operating system can trigger the abort error.
- Firewall Interference: Windows or third-party firewall applications may obstruct QuickBooks’ connection to the company file, causing this error.
- Windows Power Saving Mode: When Windows enters power saving mode, it can destabilize the internet connection, leading to the abort error message.
- Lack of Administrative Access: QuickBooks requires complete control over the company file folder. Logging in from an account without administrative rights can result in the application aborting and terminating unexpectedly.
Recognizing these triggers is the first step in resolving the ‘QuickBooks Connection has been Lost’ Abort Error and ensuring a stable and uninterrupted experience with QuickBooks Desktop.

How Do I Stop QuickBooks from Aborting?
By following these detailed steps, you can minimize the chances of QuickBooks aborting and improve your user experience:
Step 1: Open a Sample Company File in QuickBooks
To begin addressing the QuickBooks Abort Error, it’s helpful to start by opening a sample company file. This step allows you to determine if the issue is with your company file or with QuickBooks itself. Here’s how you can do it:
- Start QuickBooks Without Opening a Company File:
- Launch QuickBooks, but instead of opening your company file, choose the option to suppress the opening of any file. This can usually be done by holding the ‘Ctrl’ key as you open QuickBooks, which leads you to the ‘No Company Open’ window.
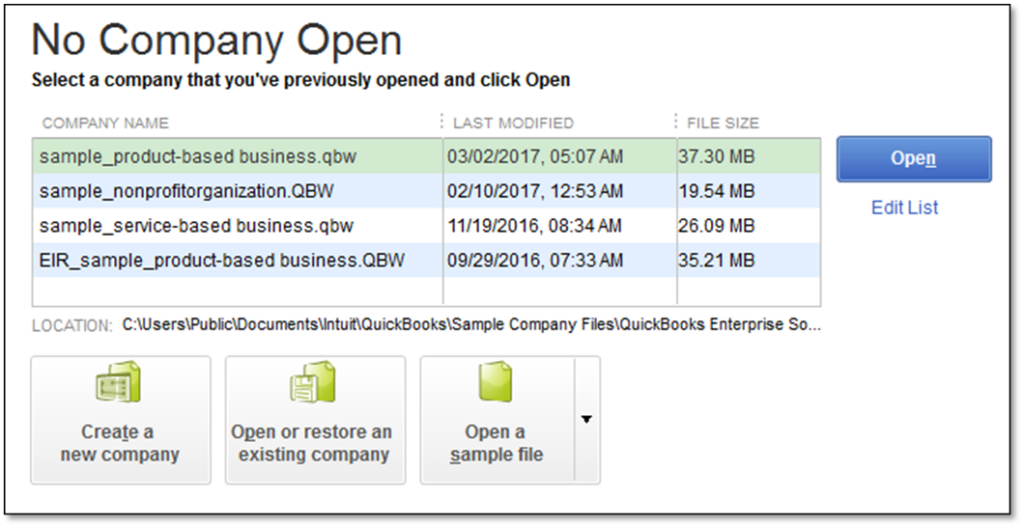
- Open a Sample File:
- In the ‘No Company Open‘ window, select the option to open a sample file. QuickBooks typically offers several sample files for you to choose from.
- Analyze the Sample File:
- Once the sample file is open, observe its performance. If the sample file runs without any issues, it indicates that the problem may lie specifically with your regular company file rather than QuickBooks as a whole.
By starting with this step, you can isolate the issue and determine the appropriate course of action for resolving the QuickBooks Abort Error. If the sample file opens successfully, the next steps will involve troubleshooting your specific company file.
Step 2: Disable Antivirus and Firewall For instance
At times, your computer’s security systems, such as Antivirus programs and Firewalls, might interfere with QuickBooks. These security features might mistakenly flag QuickBooks as a threat, thereby causing the Abort Error. Therefore, you might need to disable them temporarily to resolve this issue.
Disabling Antivirus
Your antivirus software ensures your computer’s safety from malicious threats. However, it can sometimes conflict with other software like QuickBooks. Here’s how you can disable it:
- Find the antivirus icon on your taskbar and right-click it.
- Select ‘Temporarily Disable’ or a similar option from the context menu.
- Choose the time duration to keep the antivirus disabled. It is advisable to reactivate it as soon as you’re done with QuickBooks to avoid any potential security risks.
Remember, the steps may vary depending on the specific antivirus software you’re using.
Dealing with the Firewall
Your Firewall works as a protective shield for your network, preventing unauthorized access. However, this protection can occasionally cause conflicts with QuickBooks. Follow these steps to disable it:
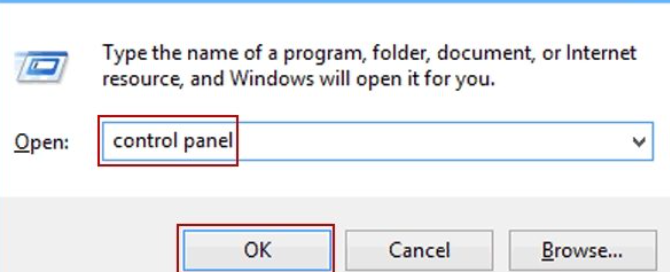
- Open the ‘Control Panel‘ on your computer.
- Navigate to ‘System and Security‘ and click on ‘Windows Defender Firewall’.
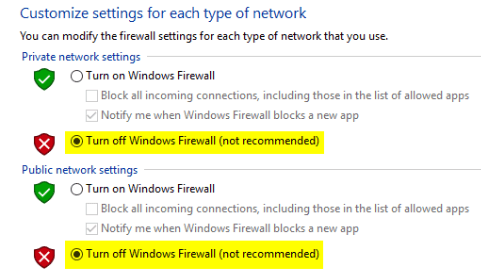
- On the left-hand side, click on ‘Turn Windows Defender Firewall on or off‘.
- Select ‘Turn off Windows Defender Firewall‘ for both private and public network settings.
- Click ‘OK‘ to save the changes.
Once you’ve completed your QuickBooks tasks, remember to turn your Firewall back on to keep your network secure.
If the QuickBooks abort error message persists after disabling your Antivirus and Firewall, move to the next step.
Step 3: Run Verify and Rebuild Data Utility in QuickBooks
After ensuring that your firewall and antivirus settings are not interfering with QuickBooks (as covered in Step 2), the next step is to use the Verify and Rebuild Data Utility. This powerful tool in QuickBooks can help identify and fix data integrity issues that might be contributing to the Abort Error.
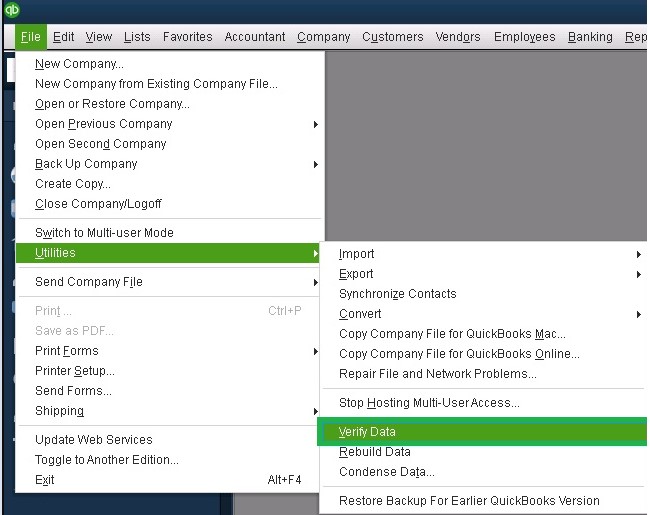
- Run the Verify Data Utility:
- Open QuickBooks and go to the ‘File‘ menu.
- Choose ‘Utilities‘ and then select ‘Verify Data‘.
- Allow the tool to run. It will check your file for data issues.
- Analyze the Verify Data Results:
- If the Verify Data utility finds issues, it will prompt you to rebuild your data.
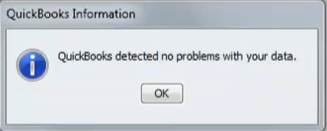
- If no issues are found, your data is likely fine, but if problems are detected, proceed to the next step.
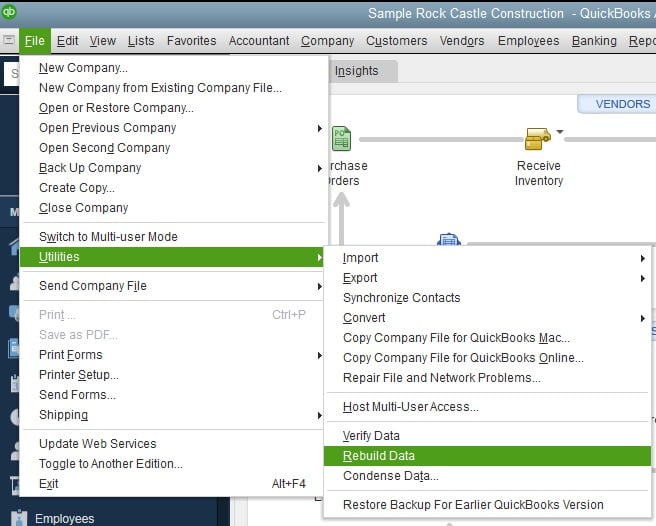
- Run the Rebuild Data Utility:
- In the ‘File’ menu under ‘Utilities’, select ‘Rebuild Data’.
- You’ll receive a warning to back up your company file, which is highly recommended before proceeding.
- Follow the Rebuild Prompts:
- Once you’ve backed up your file, the Rebuild Data utility will start. Follow any prompts that appear during the process.
- Re-run Verify Data:
- After the Rebuild Data utility completes, run the Verify Data utility again to check if there are still issues with your data.
By completing this step, you’ll ensure that your QuickBooks data is as error-free as possible, which can often resolve issues like the Abort Error. If the error persists even after running these utilities, it indicates the problem might be more complex, requiring further troubleshooting or professional assistance.
Step 4: Renaming the QBWUSER.INI File to Tackle QuickBooks keeps aborting
When dealing with the QuickBooks Abort Error, a key step is to address potential issues with the QBWUSER.INI file. This file, critical for QuickBooks operations, stores the list of previously opened company files and facilitates their efficient opening. However, a damaged or corrupted QBWUSER.INI file can often be the root cause of the abort error. Renaming this file encourages QuickBooks to generate a new, error-free version.
Here’s how to rename your QBWUSER.INI file:
- Access File Explorer: Open ‘File Explorer’ on your computer.
- Navigate to the File Location: Go to ‘C:\Users[Your user name]\AppData\Local\Intuit\QuickBooks [year]’.
- Locate the QBWUSER.INI File: Within this folder, find the ‘QBWUSER.INI’ file.
- Rename the File: Right-click on the file and select ‘Rename’ from the drop-down menu. Change the file name to ‘QBWUSER.INI.test’ by adding ‘.test’ at the end.
- Save Changes: Confirm and save your changes.
QuickBooks will now create a new QBWUSER.INI file when it restarts, potentially resolving the abort error.
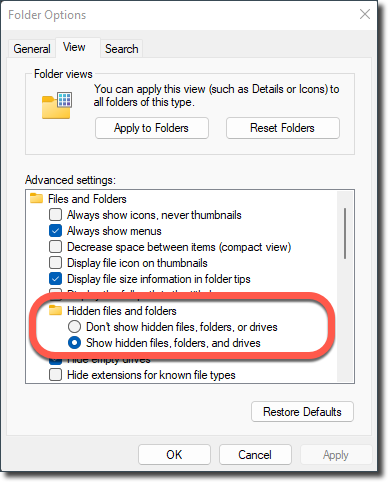
Note: The ‘AppData‘ folder may be hidden by default. If you don’t see it, enable ‘Hidden Items‘ in the ‘View’ tab of File Explorer.
Step 5: Use QuickBooks Tool Hub
The QuickBooks Tool Hub is a one-stop solution for many common QuickBooks issues, including the abort error. It’s an application that houses a variety of QuickBooks tools, each designed to diagnose and fix specific types of problems.
Download QuickBooks Tool Hub
Follow these steps to download the Tool Hub:
- Visit the official QuickBooks website.
- Navigate to the downloads section and look for ‘QuickBooks Tool Hub‘.
- Click on ‘Download Now‘ and save the file in a location that’s easy to find.
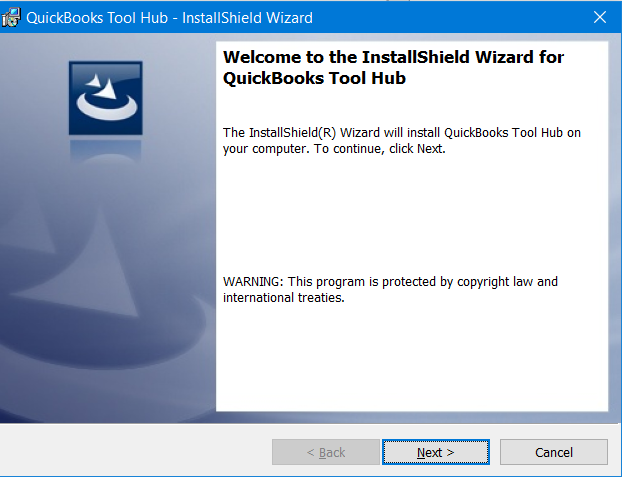
- Run the downloaded file and follow the on-screen instructions to install it.
Run Quick Fix My Program
The ‘Quick Fix my Program’ tool within the Tool Hub can rectify common errors. Here’s how to use it:
- Open the QuickBooks Tool Hub.
- In the tool hub, select ‘Program Problems’.
- Choose ‘Quick Fix my Program’ and wait for the tool to run. It might take a minute or two.
Run QuickBooks File Doctor
The QuickBooks File Doctor is another tool within the Tool Hub designed to fix issues related to company files and network errors.
Here’s how to run it:
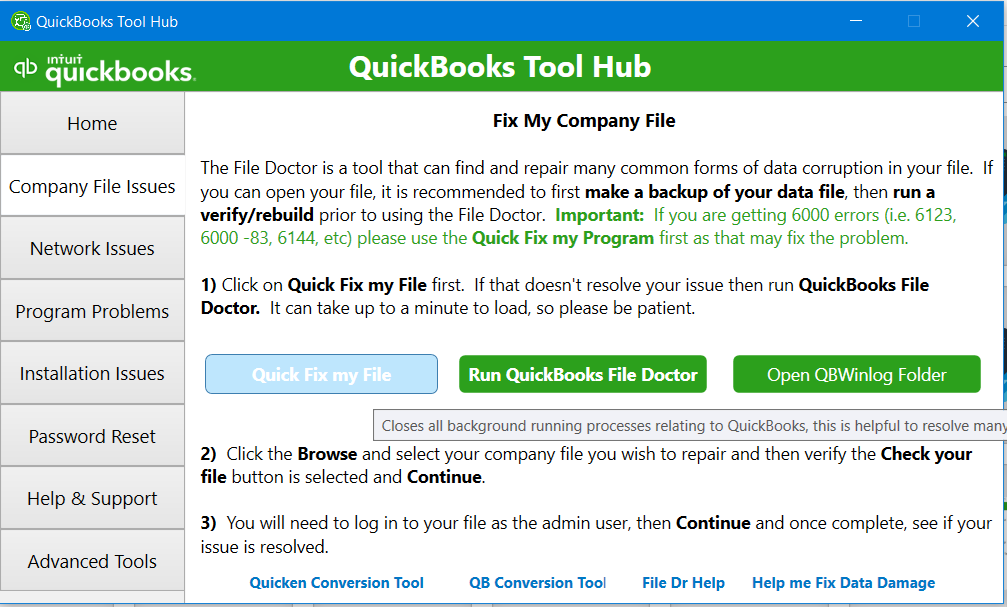
- In the QuickBooks Tool Hub, select ‘Company File Issues’.
- Click on ‘Run QuickBooks File Doctor’. The process might take a bit of time, depending on the size of your file.
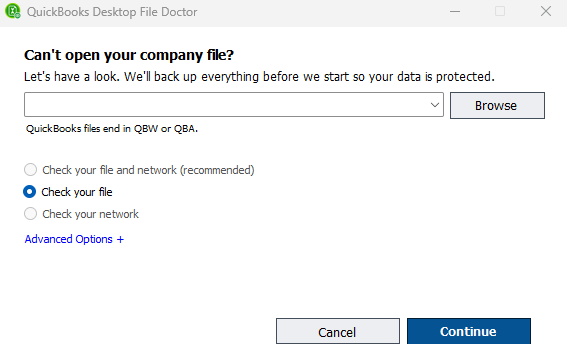
- Browse and select your company file from the drop-down menu in the QuickBooks File Doctor.
- Choose ‘Check your file’ and ‘Continue’.
- Enter your QuickBooks admin password and click on ‘Next’. Wait for the scan to complete.
Please note, the File Doctor tool only works on .qbw and .qba files. Also, if your company file is significantly large (over 2GB), consider using the File Doctor standalone version for better results.
If the issue persists even after using the QuickBooks Tool Hub, proceed to the next step for more advanced troubleshooting.
Step 6: Repairing QuickBooks Desktop to Resolve Abort Errors
When a QuickBooks connection has been aborted, using the Windows Repair feature can be a practical solution. This tool allows you to address software issues without needing a full reinstallation. Here’s a step-by-step guide:
Enabling Safe Mode:
Safe Mode is a diagnostic setting in your operating system, useful for troubleshooting:
- Restart your computer.
- As it boots, press and hold the ‘F8’ key.
- This action opens the ‘Advanced Boot Options’ menu.
- Use arrow keys to select ‘Safe Mode’ and press ‘Enter’.
Initiating QuickBooks Repair:
To repair QuickBooks:
- Close any open QuickBooks applications.
- Open the ‘Control Panel‘ on your computer.
- Navigate to ‘Programs‘ > ‘Programs and Features‘.
- Locate QuickBooks in the installed programs list and select it.
- Choose ‘Uninstall/Change‘.
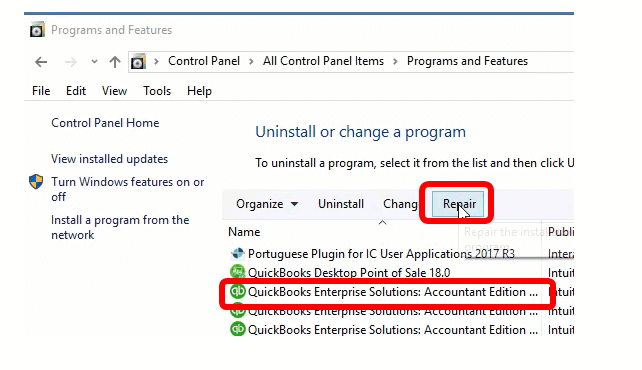
- In the QuickBooks installation window, select ‘Next‘, then ‘Repair‘, and ‘Next‘ again.
- Click ‘Repair‘ once more and wait for the process to complete.
- Finish by clicking ‘Finish‘.
Reinstalling QuickBooks in Safe Mode:
If repairing doesn’t fix the issue, try reinstalling QuickBooks in Safe Mode:
- Download the QuickBooks Clean Install Tool from the official site.
- Save the file to your desktop.
- Open the file named QuickBooks_Clean_Install_Utility.exe.
- Agree to the license agreement by clicking ‘I Accept‘.
- Choose your QuickBooks version and click ‘Continue‘.
- When prompted with “QuickBooks is now ready for a clean install…”, click ‘OK‘.
- Reinstall QuickBooks using your license and product numbers.
Following these procedures should rectify the QuickBooks Desktop program issues. However, if the abort error persists, consider reaching out to QuickBooks Data Recovery Services for advanced assistance.
In wrapping up
We trust that this article has been a valuable resource in guiding you through the steps to tackle the QuickBooks Abort Error. Though this issue can be frustrating, it often can be resolved with the correct guidance. If you have carefully followed our guide but continue to face the error, there’s no need for concern. Our dedicated QB Data Services team is on standby to provide you with expert assistance. Feel free to reach out to our specialists for tailored and advanced solutions. We are committed to ensuring your smooth and efficient experience with QuickBooks. Remember, you’re not alone in this journey – help is just a phone call away. Continue to make the most of QuickBooks’ features, and rest assured that we’re here to support you through any challenges you may encounter.
What Causes QuickBooks Aborts after Inactivity?
QuickBooks may abort after inactivity due to several reasons:
Corrupted or Damaged Company Files: Damage in the company file can interfere with QuickBooks processes, causing it to abort.
Network Connectivity Issues: If QuickBooks loses connection to the server or network, it may shut down to prevent potential data corruption.
Mismatched Versions: Using different versions of QuickBooks on the server and workstations can lead to incompatibility issues, causing the software to abort.
Insufficient System Resources: If the system running QuickBooks doesn’t have enough memory or resources, the software might terminate unexpectedly after inactivity.
Always ensure your software is updated, and your network is stable, and regularly back up company files to mitigate these issues. If problems persist, consider reaching out to QuickBooks Data Service professionals.
