
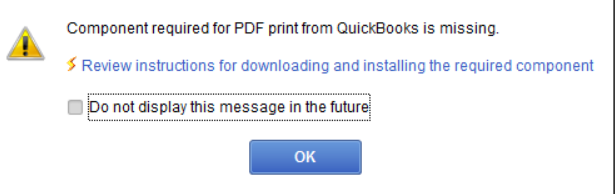
Encountering the “QuickBooks detected that a component required to create PDF files is missing” error can disrupt your smooth sailing through QuickBooks tasks. It’s a moment of frustration that many users can relate to: You hit ‘print’, and suddenly, you’re faced with a cryptic and vague error message.
While QuickBooks is a robust tool, it’s not immune to printing-related glitches, and the “QuickBooks Missing PDF Component” error is particularly baffling. It hints at a problem but leaves you guessing about the specifics. However, there’s good news: we’ve meticulously analyzed this issue and developed this guide to demystify this notorious error and offer effective solutions, aiming to restore a seamless QuickBooks experience.
If you’ve diligently followed the solutions mentioned below and still find yourself grappling with the issue, there’s no need for concern. I strongly recommend reaching out directly to a QB Data Service specialist. Simply call on our toll free helpline number +1-888-538-1314, and their dedicated team will be at your service, guiding you through resolving the “QuickBooks Missing PDF Component” challenge.
QuickBooks Detected That a Component Required to Create PDF Files Is Missing — What This Means
When this message appears, QuickBooks is alerting you that a core Windows component required for generating PDFs has stopped functioning. This is the same underlying problem that causes the common issue “QuickBooks PDF Not Working”, where users cannot save, email, or print invoices and reports in PDF format.
QuickBooks depends on tools like Microsoft XPS Document Writer, Microsoft Print to PDF, and the QuickBooks PDF Converter to create PDF files. If any of these components become damaged, disabled, or removed—often after Windows updates—QuickBooks cannot complete the PDF creation process.
As a result, you may see symptoms such as:
- QuickBooks not creating or saving PDFs
- Emailing invoices fails
- Blank or corrupted PDF output
- QuickBooks freezing during PDF generation
- Errors appearing before the PDF is created
These issues do not indicate damage to your company file—they simply mean QuickBooks has lost access to one or more required PDF components. Now that you understand the meaning behind this message, let’s look at the actual reasons why this error occurs.

Reasons for Component Required for PDF Print from QuickBooks is Missing
The error message “QuickBooks detected that a component required to create PDF files is missing” can occur due to multiple underlying issues within Windows and QuickBooks. These problems prevent QuickBooks from generating, saving, emailing, or printing PDF documents. Below are the most common reasons behind this error.
1. Outdated or Damaged QuickBooks PDF Components
Over time, QuickBooks PDF-related files—including the QuickBooks PDF Converter, QBprint.qbp, and related drivers—can become outdated or corrupted. This is one of the most common causes of the QuickBooks PDF not working issue.
2. Broken or Incorrect Printer & Print Spooler Settings
QuickBooks uses Windows printer settings to create PDFs. If the Print Spooler service is disabled, or if default printer settings are damaged, QuickBooks may fail to generate PDF files correctly and trigger missing component errors.
3. Windows 11 Compatibility Issues
Many users experience QuickBooks PDF component missing in Windows 11 due to Windows updates removing or disabling key printing components such as:
- Microsoft XPS Document Writer
- Microsoft Print to PDF
- Required .NET Framework versions
These incompatibilities can directly lead to PDF creation failures.
4. Corrupt or Missing Microsoft XPS Services
QuickBooks relies on Microsoft XPS Document Writer to convert forms into PDFs. If XPS Services or XPS Viewer is turned off or corrupted, QuickBooks cannot generate PDFs and displays a missing component error.
5. Disabled or Damaged Microsoft Print to PDF Feature
If Microsoft Print to PDF is missing or damaged, QuickBooks may attempt to print using XPS instead of PDF, causing incorrect output or failure to save invoices and forms as PDF files.
6. QuickBooks Printing to the Wrong Driver (XPS Instead of PDF)
When QuickBooks defaults to an incorrect printer driver—especially XPS—PDF creation fails. This misconfiguration is common after Windows updates or major QuickBooks version upgrades.
7. Conflicts with Third-Party PDF or Print Software
Applications like:
- Adobe PDF tools
- PDF printers
- VPN-based printing utilities
- Security software blocking printer drivers
…can interfere with QuickBooks’ built-in PDF engine and cause missing component errors.
8. Incorrect TEMP Folder Permissions
QuickBooks uses the Windows TEMP folder to prepare PDF files before creating them. Restricted or corrupted TEMP permissions often result in:
- QuickBooks cannot save to PDF
- QuickBooks cannot create PDF
- PDF component missing errors
Identifying which of these issues is affecting your system is the first step to fixing the “Component Required for PDF Print from QuickBooks Is Missing” error and restoring full PDF functionality for printing, saving, and emailing forms.
Signs of QuickBooks PDF Component Missing Desktop 2022 and 2023
Some common signs that indicate you’re experiencing QuickBooks detected that a component required to create PDF are:
- Unable to print PDF in QuickBooks.
- Error messages related to QuickBooks PDF file errors.
- QuickBooks cannot create PDF, or the PDF is missing information.
- The printer queue displays an error or stops responding.
- QuickBooks freezes or crashes when attempting to print or convert to PDF.
Prior Things to do Before Troubleshooting QuickBooks Missing PDF Component Windows 11, 10
Before diving into troubleshooting for QuickBooks pdf component missing Windows 11, it’s important to take some precautions to protect your data and ensure a smooth process:
- Backup your QuickBooks data: Create a backup of your company file to prevent any data loss during the troubleshooting process.
- Update QuickBooks: Ensure you’re using the latest release of QuickBooks to benefit from recent bug fixes and compatibility improvements.
- Check your printer: Confirm that your printer is working correctly by printing a test page from another application.
- Restart your computer: Rebooting your computer can solve temporary issues and give you a clean slate for troubleshooting.
Troubleshooting QuickBooks Component Required to Create PDF Files is Missing
If you’re facing the error message indicating a missing component for creating PDF files in QuickBooks, these steps can guide you to a solution:
Step 1: Run the QuickBooks PDF Repair Tool to fix
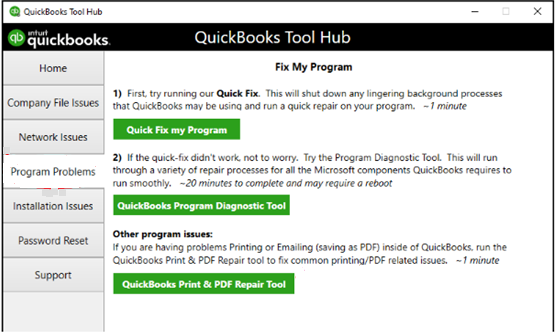
- Download and install the QuickBooks PDF Repair Tool from the official Intuit website.
- Run the tool and follow the on-screen instructions to fix any detected issues.
- Restart your computer after the repair process is complete.
- Check if the ‘QuickBooks Missing PDF Component‘ issue has been resolved using the QuickBooks Print and PDF Repair tool.
Note: The PDF Repair Tool is designed to address common QuickBooks PDF file errors and may not resolve all issues.
Step 2: Check and Reinstall the QuickBooks PDF Converter
- Navigate to the “Printers and Faxes” section in your computer’s Control Panel.
- Check if the QuickBooks PDF Converter is listed. If the QuickBooks pdf component missing, reinstall it by following the official Intuit guidelines.
- Test the converter by attempting to print or save a PDF from QuickBooks.
Step 3: Configure Printer Settings
Here are the steps to configure printer settings on Windows 7, 8, 10, 11 and Mac:
Windows 7:
- Click on the Start button and select Devices and Printers.
- Right-click on the printer you want to configure and select Printer Properties.
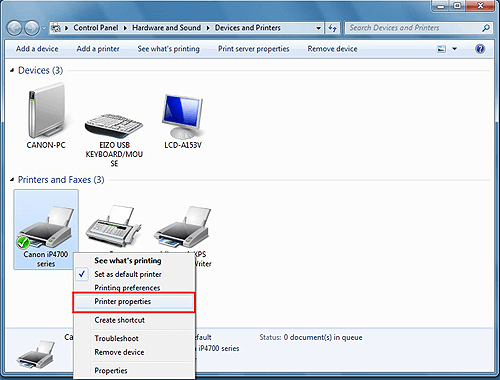
- Click on the Advanced tab and select Printing Defaults.
- Make the necessary changes to the printer settings and click OK.
Windows 8 and 10:
- Click on the Start button and select Settings.
- Click on Devices and then select Printers & Scanners.
- Select the printer you want to configure and click on Manage.
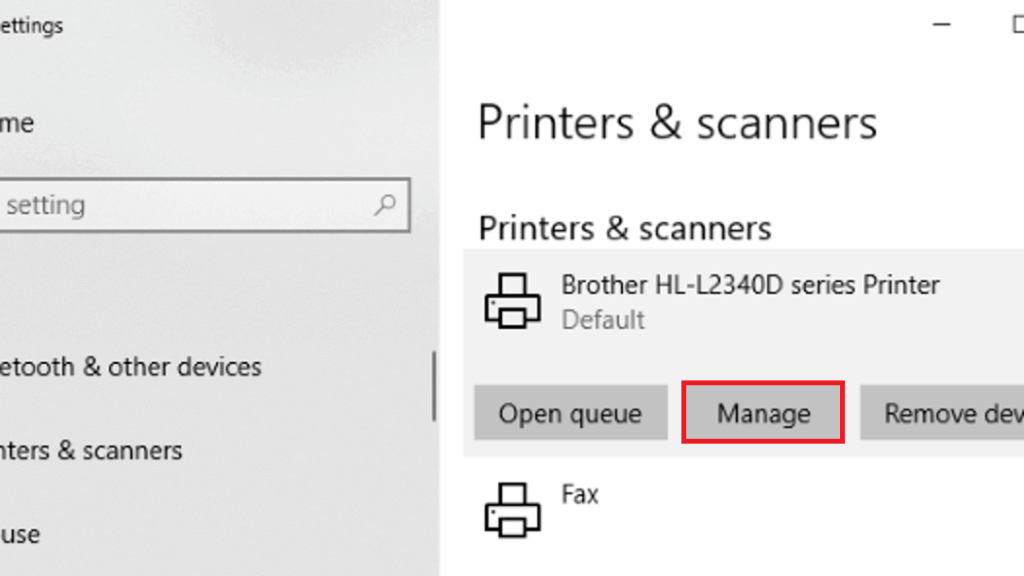
- Click on Printer properties and then select Preferences or Printing Defaults.
- Make the necessary changes to the printer settings and click OK.
Windows 11:
- Click on the Start button and select Settings.
- Click on Printers & Scanners.
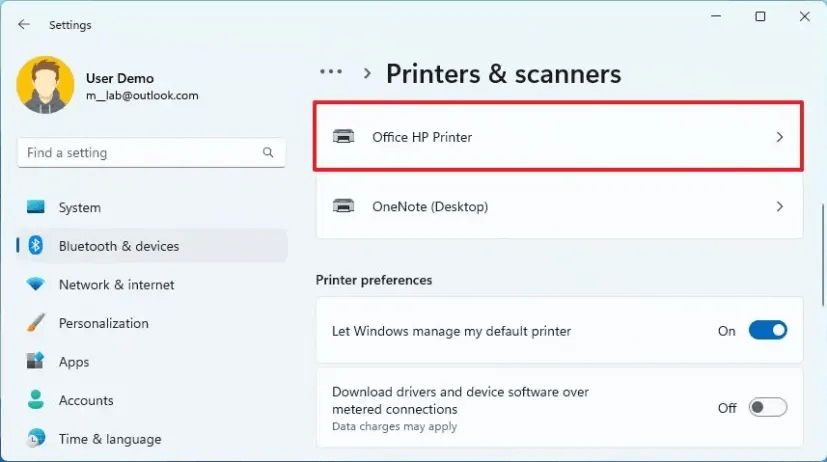
- Select the printer you want to configure and click on Manage.
- Click on Printer properties and then select Preferences or Printing Defaults.
- Make the necessary changes to the printer settings and click OK.
Mac:
- Click on the Apple menu and select System Preferences.
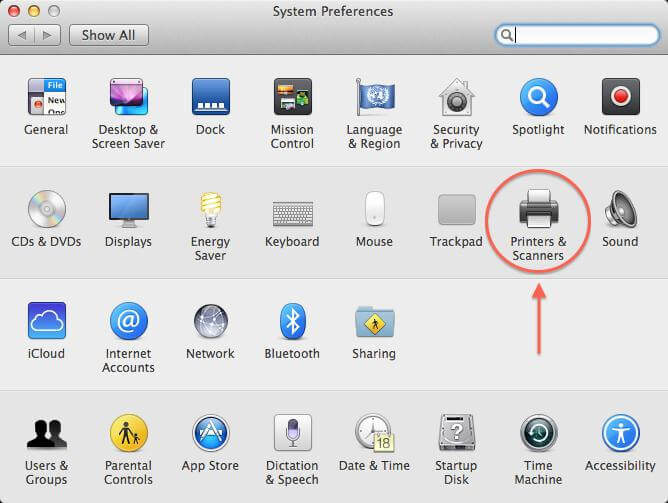
- Click on Printers & Scanners.
- Select the printer you want to configure and click on Options & Supplies.
- Click on Driver and select the printer model.
- Make the necessary changes to the printer settings and click OK.
Note: The steps may vary slightly depending on the version of the operating system and the printer model.
Step 4: Disable Third-Party Applications and Fix QuickBooks Missing PDF Component Windows 10
- Temporarily disable any third-party applications or services that may conflict with QuickBooks, such as antivirus software or firewalls.
- Restart QuickBooks and attempt to print or save a PDF.
- If successful, re-enable the third-party applications and configure them to work smoothly with QuickBooks.
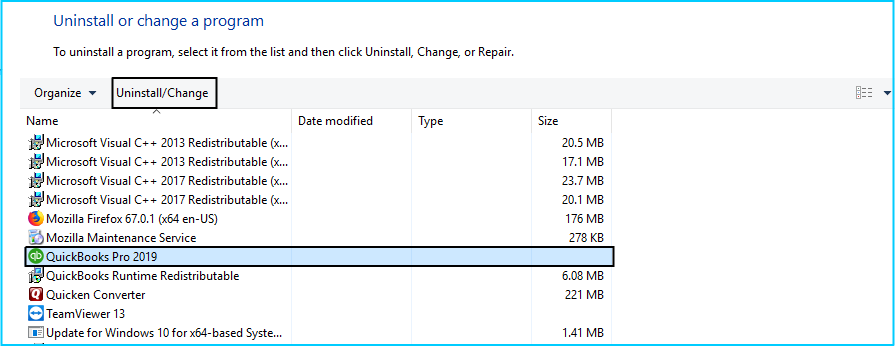
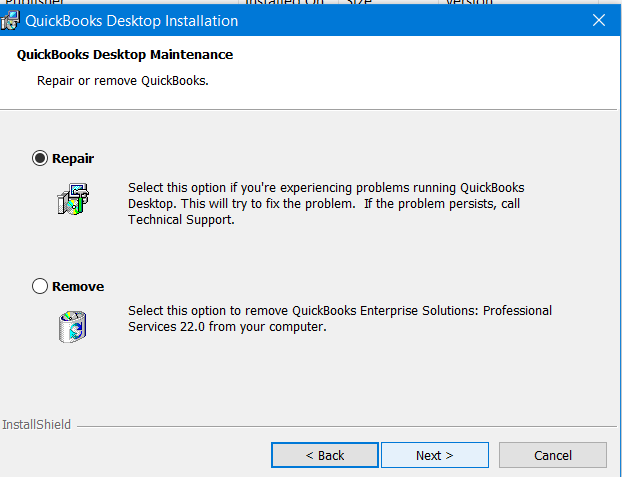
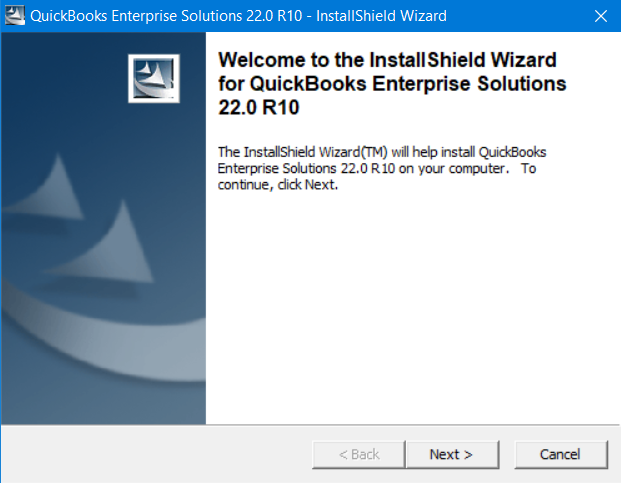
Step 5: Reinstall the QuickBooks Desktop Program
If you’ve tried all the troubleshooting steps and still QuickBooks Detected that a Component Required to Create PDF, it may be time to uninstall and reinstall the program. Here are the steps to do so:
- Before you uninstall QuickBooks, make sure to backup your company file to avoid losing any important data.
- Go to the Control Panel on your computer and select “Uninstall a program.” Find QuickBooks in the list of installed programs, right-click on it, and select “Uninstall.” Follow the prompts to complete the uninstallation process.
- After uninstalling QuickBooks, rename any installation folders that may be leftover on your computer. These folders may be located in the Program Files or Program Files (x86) directory. Rename them to something like “old QuickBooks.”
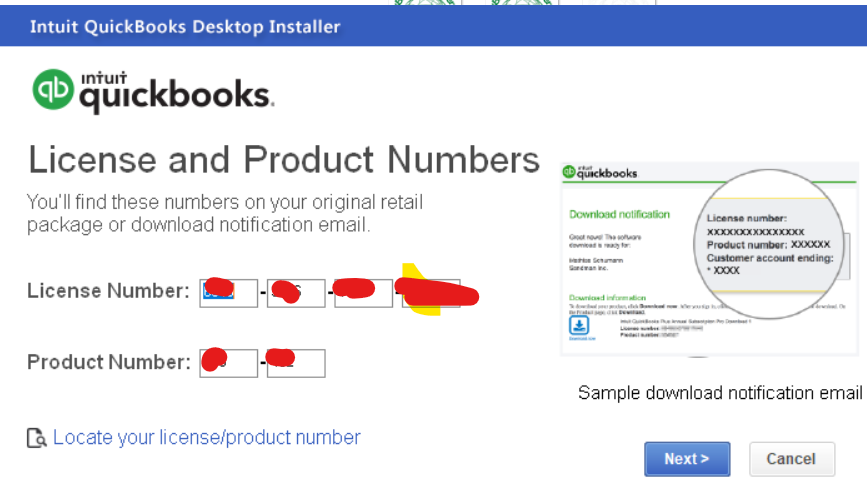
- Go to the official QuickBooks website and download the latest version of the program. Follow the prompts to install it on your computer.
- Once you’ve reinstalled QuickBooks, restore your company file from the backup you made in step 1.
- Try printing and converting to PDF again to see if the issue has been resolved.
Reinstalling QuickBooks can be a time-consuming process, but it can be the solution to stubborn QuickBooks missing pdf component issues. If you’re still having problems, you may want to contact QuickBooks support for further assistance.
Step 6: Check Printer Driver Updates
Updating the printer driver may help resolve the missing PDF component issue in QuickBooks. Below, we have outlined the steps to check for and update your printer driver.
- Go to the Start menu on your computer and open the Settings app.
- Choose ‘Devices’ and then select ‘Printers & scanners’.
- Find and select your printer from the list of devices.
- Click on ‘Manage’ and then choose ‘Printer properties’.
- Navigate to the ‘Advanced’ tab within the Printer properties window.
- Click on ‘New Driver’ to open the ‘Add Printer Driver Wizard’.
- Follow the wizard’s instructions to check for available updates for your printer’s driver.
- If updates are found, download and install them, then follow the prompts to complete the update process.
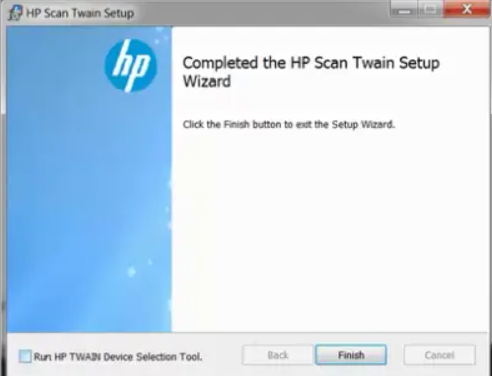
Step 7: Install Twain Drivers to resolve PDF Error in QuickBooks
Step 6: Installing Twain Drivers to Address the PDF Error in QuickBooks 🛠️
To tackle the ‘QuickBooks Missing PDF Component error, installing the Twain driver can be a great solution. Here’s how you can do it:
- Download the Twain Driver: Begin by finding and downloading the Twain driver from a trusted source. 🌐
- Extract the Downloaded File: Once the download is complete, extract the file to a folder on your desktop. This makes it easier to find later on. 📂
- Initiate Installation: Open the folder where you’ve extracted the files. Look for the “Install.exe” file and double-click it to start setting things up. 🖱️
- Follow Installation Wizard: A wizard will guide you through the installation. Just follow the prompts on the screen, clicking “Next” to move forward. 🧙
- Agree to EULA: Take a moment to read and agree to the End-User License Agreement (EULA). After agreeing, click “Next” to proceed. 📜
- Select Installation Location: Choose where you want to install the Twain driver and click “Next”. 📍
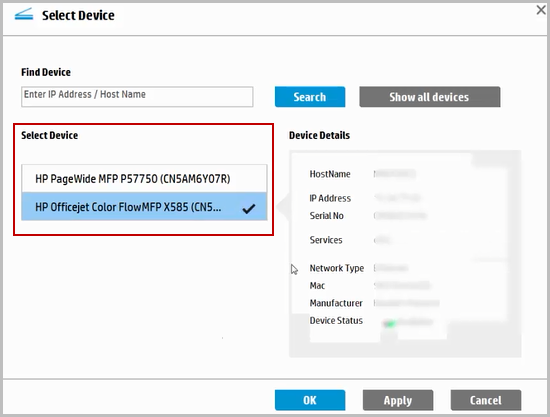
- Choose Printer: Now, select the printer you’ll be using and click “Next”. 🖨️
- Install the Driver: Click on “Install” to begin the actual installation process. 🔧
- Complete the Installation: After the installation wraps up, click “Finish” to close the wizard. 👍
- Restart Your Computer: Finally, restart your computer to ensure all changes are effectively applied. 🔄
With these steps, the ‘QuickBooks Missing PDF Component’ error should be resolved, and you’ll be back to handling PDFs in QuickBooks in no time!
Step 8: Reset QuickBooks Desktop
Resetting the QuickBooks desktop settings can sometimes quickly eradicate the issue where QuickBooks has detected that a component required to create PDF files is missing.
- Close your QuickBooks Desktop application if it’s open.
- Make sure to back up your QuickBooks company file to avoid any data loss.
- Press the ‘Windows’ key on your keyboard and type ‘Run’ to open the Run command dialog box.
- Type in ‘msconfig’ and then click ‘OK’ to open the System Configuration utility.
- Go to the ‘General’ tab and choose ‘Selective startup’.
- Uncheck the ‘Load startup items’ checkbox.
- Go to the ‘Services’ tab and check ‘Hide all Microsoft Services’.
- Click ‘Disable all’ to turn off the remaining services.
- Ensure that the ‘Hide all Microsoft Services’ checkbox is still checked, and then recheck any services associated with QuickBooks.
- Click ‘OK’ and then restart your computer as prompted to apply these configuration changes.
- After restarting, open QuickBooks and go through the initial setup process to reset your QuickBooks Desktop to its default settings.
Require additional help?
After following the outlined troubleshooting steps, you’re well-equipped to tackle the issue of QuickBooks detected that a component required to create pdf. These solutions are designed to restore your ability to print and convert files smoothly in QuickBooks. It’s important to remember that the underlying cause can vary, so you might need to experiment with different methods. If the problem persists or you require further guidance, feel free to reach out QB Data service expert at +1-888-538-1314 for professional assistance. Our QB Data Services team is available round the clock and their helpline number is, ready to offer you the support you need.
FAQs on QuickBooks Detected that a Component Required to Create PDF
Q1: Why am I seeing the “QuickBooks 2024 can’t complete the current action” error message?
A1: This error message can be caused by a number of issues, such as damaged QuickBooks files, a firewall blocking QuickBooks, or QuickBooks detected that a component required to create pdf files is missing, such as the PDF converter. Depending on the cause, different troubleshooting steps may be required.
Q2: How can I fix missing components in QuickBooks Desktop?
A2: To fix the missing pdf component QuickBooks Desktop, consider reinstalling QuickBooks using a clean install, repairing the QuickBooks installation, or reaching out to QuickBooks support for further assistance.
Q3: What should I do if the component required for PDF print from QuickBooks is missing?
A3: If you encounter an error stating that the required component for PDF print from QuickBooks is missing, you should try repairing your QuickBooks installation, reinstalling the PDF converter, or updating your version of QuickBooks.
Q4: How can I fix the QuickBooks PDF component missing Error?
A4: To fix the “QuickBooks pdf component missing, you might need to reinstall your QuickBooks software, repair your QuickBooks installation, or reinstall the PDF converter.
Q5: How can I fix the “QuickBooks 2024 missing PDF component Windows 11” error?
A5: Fixing the “QuickBooks Missing PDF Component” in Windows 11 can be a piece of cake. Just follow the subsequent steps in the right order:
–> Repair your QuickBooks Desktop program files
–> Toggle the Microsoft Adobe Reader servers
–> Run the Print and PDF Repair Tool
What is QuickBooks can’t complete the current action due to a missing component?
The error “QuickBooks can’t complete the current action due to a missing component” typically indicates a problem with your installation. Resolve it by updating QuickBooks, repairing the installation, or reinstalling the software. Ensure your Windows is also up to date.
What If QuickBooks crashes when sending an invoice?
For QuickBooks crashing while sending invoices, consider clearing the application’s cache, running the QuickBooks Install Diagnostic Tool, or creating a new invoice template. If these steps don’t work, reaching out to QuickBooks support may be necessary.

I recently got a new laptop running Windows 11 and installed QuickBooks Desktop Pro Plus, only to encounter the dreaded “QuickBooks missing PDF component” error right away. I tried using the QB Tool Hub, but it didn’t work. Then I came across this post, followed the instructions exactly, and it solved my issue perfectly. Huge thanks for the solution!
Hi YDE Norma,
You can try using the QuickBooks Tool Hub to resolve the Missing PDF Component issue. Also, could you let me know which version of QuickBooks you’re using? It’ll help in providing more specific guidance.
I’m using QuickBooks Pro Plus 2021.
Hi David,
I’d like to address the issue with the version you’re using.
QuickBooks Desktop Pro Plus 2021 is a “sunset version,” meaning it has reached its end of life and is no longer supported. This could explain the compatibility issues you’re facing with newer operating systems like Windows 11.
To resolve this, we recommend upgrading to a newer version of QuickBooks. The latest versions are optimized for modern systems, ensuring better performance, enhanced security, and access to the most recent features and updates.
Before proceeding, make sure to back up your company files to ensure a smooth transfer of your data.
If you have any further questions or need help with the process, please don’t hesitate to ask. I’m here to assist you!