
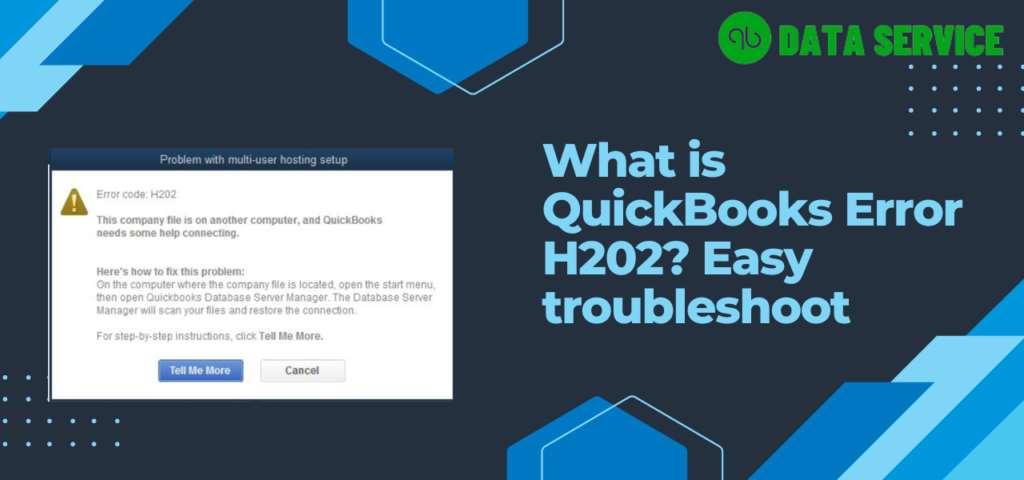
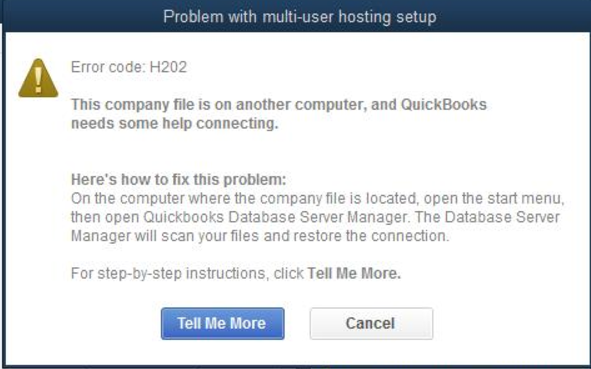
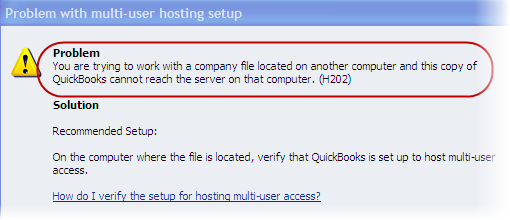
QuickBooks Multi-User mode is a valuable feature that allows users within an organization to seamlessly collaborate and share data. However, there may be times when a user encounters an error while attempting to switch to this mode. One such error is “QuickBooks Error H202 – This Company File is located on another computer, and QuickBooks requires additional assistance in connecting.” In this guide, our expert ProAdvisor will delve into the causes, signs, and solutions for Multi-User mode issues in QuickBooks 2021, 2022, and 2023.
What is Message Code QuickBooks Error H202?
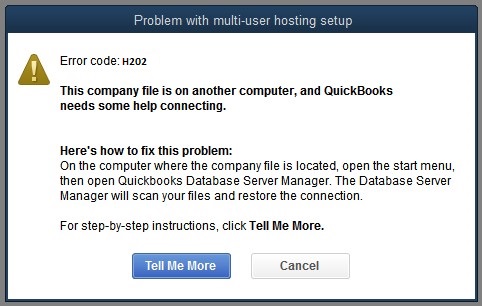
QuickBooks Error H202 is a networking issue that arises when a user cannot access a company file stored on another computer. This problem may occur if the computer hosting the file is not configured as a server or if its firewall is obstructing access to the file. To resolve this error, users should take the following steps:
- Verify that the hosting computer is correctly set up as a server.
- Ensure the firewall on the hosting computer permits access to the company file.
- Confirm that the hosting computer is powered on and connected to the network.
Numerous Causes For QuickBooks Desktop Error Code H202
Here are some common causes for “QuickBooks multi-user mode grayed out Error H202”:
- The server is busy with updating or other processes.
- Firewall inbound and outbound rules are not configured according to QuickBooks services.
- The host File is deleted or corrupted.
- QBCFmonitoservice.exe process isn’t up and running.
- You are using invalid login details.
- Psychical network disruption(Cable is disconnected or broken).
- Maybe you are not using the same QuickBooks version on your workstation.
- The company File data is corrupted.
- Maybe you have exhausted the user limit.
- The network Descriptor file is missing or damaged.
- ND, TLG file is deleted or becomes unreadable.
- Due to QuickBooks multi-user mode not syncing.
- Incorrect PORT allocation.
Top fixes for QuickBooks Error H202
Here are the all feasible and handy techniques to Fix the QuickBooks Error H202 multi-user mode not working problem:
Method 1. Use Network Diagnostic Tool and fix QuickBooks Error H202
QuickBooks Error H202 problems with connectivity and multi-user mode can be fixed with the help of the Network Diagnostic Tool.
- Downloading and setting up the QuickBooks connection diagnostic tool is the first step in the process.
- Next, navigate to the directory in which you have saved the corporate file that you need to access.
- Following that, make a note of the IP address as well as the Network Interfaces.
- Check to see if the Open Ports button is there in the Firewall Status section of your firewall. If that’s the case, then go ahead and authorize QuickBooks to use those ports by clicking on the button.
- After that, check to see if there is data connectivity.
- Finally, you should attempt to open the file for your company.
In the unlikely event that the QuickBooks error H202 persists. After that, our next piece of advice is that you modify the firewall so that it allows access to the QuickBooks ports.
Method 2. Fix H202 Error in QuickBooks Desktop by QuickBooks File Doctor Tool
You can correct the H202 error in QuickBooks Desktop by using the File Doctor Tool, which requires very little effort on your part. It’s possible that some of you are already aware of the necessity of the QuickBooks Tool Hub for the operation of this tool. As the first prerequisite, downloading or updating the tool hub is the first thing you need to do. The next step is to click the option labeled Company File Issues. The option to launch the tool will be made available to you on this tab. After that, you can start the QuickBooks company file’s scanning process, as well as open or explore it.
- Stop using “QuickBooks” on your system.
- Download the most recent version of “QuickBooks Tool Hub,” which should preferably be “1.4.0.0” or the latest.
Note: It is possible that you already have the tool hub for QuickBooks installed on your system. On the other hand, it’s possible that the version has to be upgraded. Visit the tab labeled “Home” to determine the most recent release available. Check out the area at the bottom right corner of the tab.
This is where the version will be listed. If you still can’t find it, head to the “About” section of the website. In addition to that, the version of the tool hub will be explained to you in this section. You are able to update the version despite the fact that it is not the most recent.
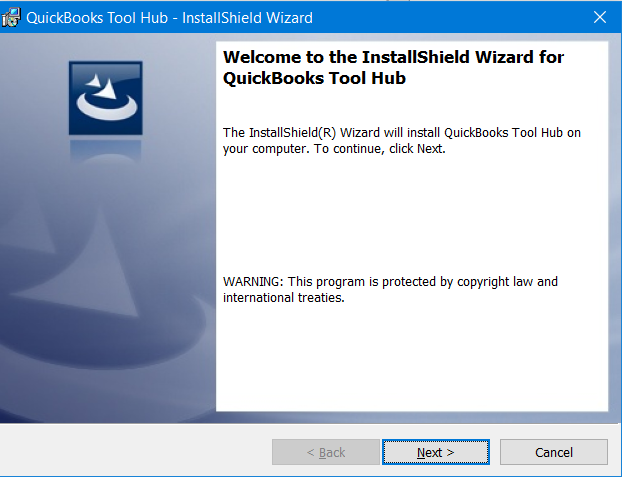
Use the steps to successfully install the QuickBooks Tool Hub on the server computer:
- It is possible to save the file that was downloaded from the tool hub either on the “Desktop” or in the “Downloads” folder.
- You can choose “QuickBooksToolHub.exe” by going to the directory where the file has been saved and selecting it from there.
- Learn how to install the tool hub by reading the instructions that appear on-screen.
- It is necessary to reach an agreement on the “Terms and Conditions” of the tool hub.
- Once the installation is finished, navigate to the “Desktop” and double-click on the icon of the tool hub to run it. Alternatively, you can click on launch QuickBooks Tool Hub and click the finish button to immediately launch it after installing it into the machine.
Please take note: If for any reason the symbol for the tool hub is not there on the “Desktop,” look for it in the “Start Menu.”
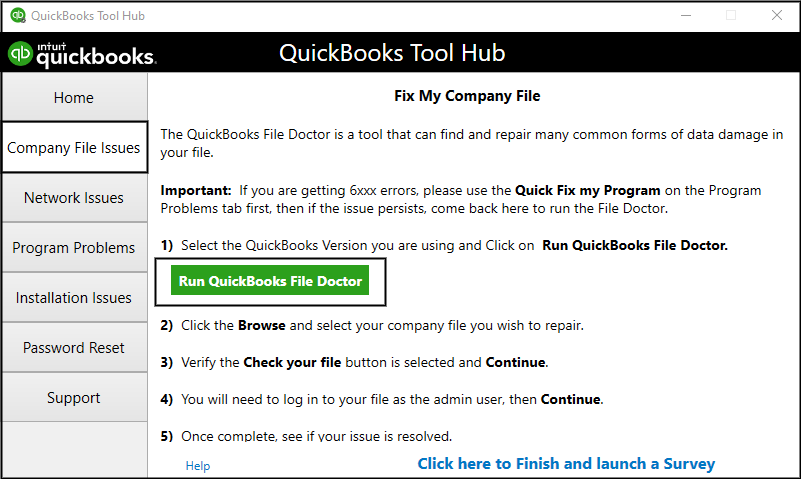
Steps to run the QBFD Tool in the server:
- To view the company’s file issues, select the appropriate tab.
- You must select “Run QuickBooks File Doctor” from the tab in order to proceed.
- When the dropdown menu appears, select “QuickBooks Company File.” You can also choose the file by pressing the “Browse and Search” button.
- Choose the option that says “Check Your File” instead.
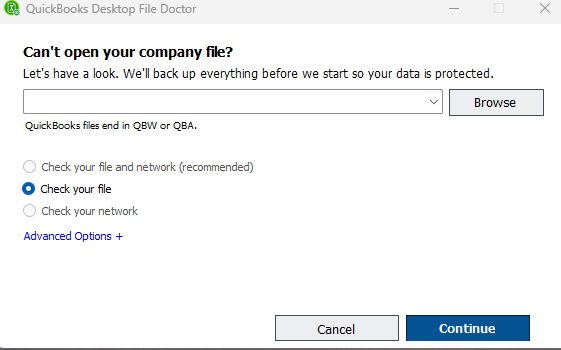
- Hit “Continue”.
- Enter the “Admin Password” that is asked for when using the QB software.
- Hit “Next”.
- To correct the QuickBooks issue H202 that occurs while switching to multi-user mode, please wait until the scanning procedure has been completed.
- You have the option, within the newer version of the program, to either “Open the File in a Newer Version of QuickBooks” or “Repair the File for Your Existing Version of QuickBooks First.” “Repair the File for Your Existing Version of QuickBooks First” is an optional step. Following the installation of the update, the previous version of the software might be unable to open the file.
- In conclusion, ensure that the software is up to date and that a backup has been created.
Method 3. Manually Configure Firewall Settings to Fix QuickBooks Error H202
It’s not uncommon for QuickBooks to run into issues when a firewall is imposing restrictions or causing interference. As a result, if you notice that it contains the Desktop message code QuickBooks error H202, you need to double-check the program’s preferences. Try to manually configure these settings as you are working through this process. You will be able to add the appropriate ports for QuickBooks Desktop 2017, 2018, 2019, or 2020 as you work through the procedure. After that, there is a possibility that the error code H202 will not be present in it.
In order to fix the Error H202 in QuickBooks Desktop, follow these instructions and manually setup your firewall:
- Click the “Start” button.
- Enter “Windows Firewall” into the search field and hit “Search.”
- To open the Windows Firewall, click on its name.
- Click the “Advanced Settings” button.
- Select “Inbound Rules” using the right mouse button.
- Click the “New Rule” button.
- Select “Port” from the menu.
- Click the “Next” button.
- Choose “TCP.”
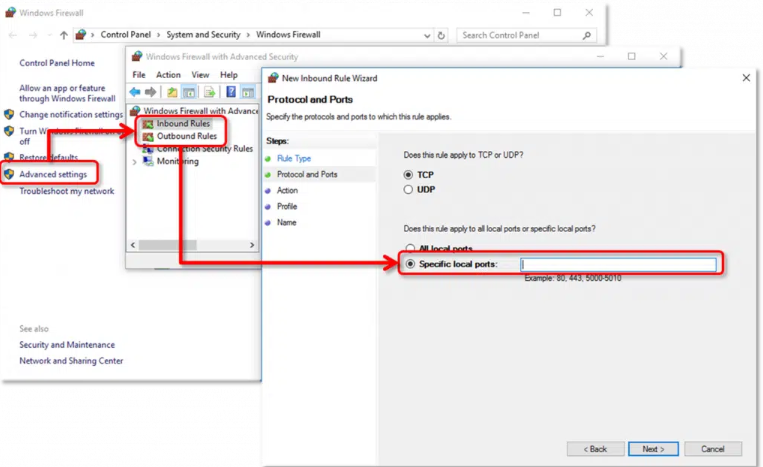
Enter the following information into each field of the local ports according to the year edition of QuickBooks:
QBD 2017: “8019, 56727, 55373-55377”
QB Desktop 2018: “8019, 56728, 55378-55382”
QuickBooks Desktop 2019: “8019, XXXXX”
QuickBooks Desktop 2020: “8019, XXXXX”
Please take note that a dynamic port is utilized in subsequent versions of QuickBooks Desktop, including 2019 and 2020. You may locate “QuickBooks Database Server Manager” in the “Start Menu,” and then launch it once you’ve located it. Choose the appropriate software version using the tab in Port Monitor. The “Port Number” should then be written down. Its format should be provided as “8019, XXXXX,” where “XXXXX” represents the dynamic port number. It is required that this format be mentioned. This is the number that should be used for the port exception.
Now, activate the multi-user mode in QuickBooks
- Open QuickBooks and log in to your company file as the admin user.
- From the main menu, select “File” and then “Utilities.”
- Click on “Host Multi-User Access.” This will activate multi-user mode for your QuickBooks company file.
- You may be prompted to confirm that you want to enable multi-user mode. Click “Yes.”
- Once multi-user mode is enabled, you can invite other users to access the company file. To do this, select “Users” from the main menu, and then select “Set Up Users.”
- Click the “Add User” button, and enter the user’s name and login credentials.
- Assign the appropriate user roles and permissions, and then click “Next” until you reach the final screen.
- Click “Finish” to save the user settings and close the wizard.
- Repeat steps 6-8 for each additional user you want to add.
- Once you have added all the users, they can access the company file by logging in to QuickBooks from their own workstations.
Note: QuickBooks multi-user mode requires that the company file is stored on a network drive that is accessible to all users. If the company file is stored on a single workstation, you may need to move it to a network drive before you can activate the multi-user mode.
Method 4. Make Sure that the QuickBooks Services are Running
It is essential that the QuickBooks services continue to operate on the server computer. The actions that are given below can be followed to determine whether or not the QuickBooksDBXX services are active. In that case, you are going to have to do it again for the QBCFMonitorService.
- In the first step, go to the Windows search box and type Run.
- In the Run window, type services.msc and then hit the Enter key on your keyboard.
- After that, on the list, double-click the QuickBooksDBXX entry.
NOTE: The XX in this sentence indicates the QB version.
- The QuickBooksDBXX Properties window will be brought up as a result. Choose Automatic there as the type of startup you want to use.
- You are required to change the state of the Service to either Running or Started.
- After that, pick the tab labeled start >> Recovery.
- To restart the service, use the “Restart the Service” option from the drop-down menu that appears after the first, second, and subsequent times it fails.
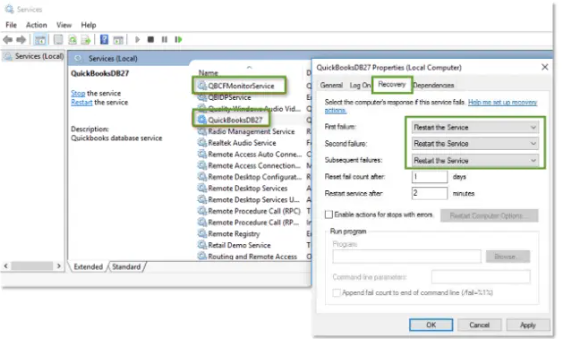
- To finish, click the Apply button, then the OK button, to preserve the changes.
You are required to repeat the steps that you have gone through for the QBCFMonitorService. After you have completed the processes that were previously outlined, launch QuickBooks on each workstation. After that, go to the menu labeled “File” and choose the option that says “Switch to Multi-user Mode.” As the Error H202 in QuickBooks has been repaired, you are free to open anything you like at this point.
Method 5. Eliminate QuickBooks Error H202 by Recreating the .ND File
If you are familiar with the factors that might lead to the H202 Error in QuickBooks, you will be aware that corruption in the .ND file is one of the potential reasons for the error. Consequently, this solution to the QuickBooks Error H202 will direct you through the process of eliminating this cause by deleting and then recreating this file.
- Press the start button and then access search, find the .ND file that you need to delete.
- Now delete that .ND file once you have found it successfully.
- Next, open the QB Database Server Manager from QuickBooks.
- Go to the scan folder tab and search for the folder of the company file.
- Now pick the company file that is troubling you and scan it with the Server Manager Tool.
- In the end, click on close when the scanning part is over.
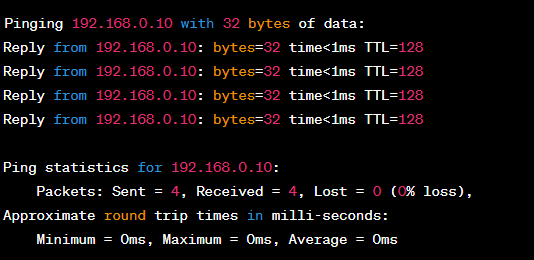
Method 6. Ping the Server through the Workstation
Pinging a server allows you to determine the degree to which it is connected to the network. This determines whether problems with the network connection are the root cause of the H202 error QuickBooks Desktop displays.
To ping your server from a workstation to check for network issues, you can follow these steps:
- Open the command prompt or terminal on your workstation.
- Type the following command:
ping <server IP address or hostname>For example, if your server’s IP address is 192.168.0.10, you would type:ping 192.168.0.10If you are using a hostname instead of an IP address, make sure that the hostname can be resolved to an IP address. You can check this by typingnslookup <hostname>. - Press Enter to start the ping test.
- Wait for the ping test to complete. You should see a series of messages indicating whether each ping was successful or not.
- If the ping test is successful, you should see messages similar to this:
- If the ping test is not successful, you may see messages like this:
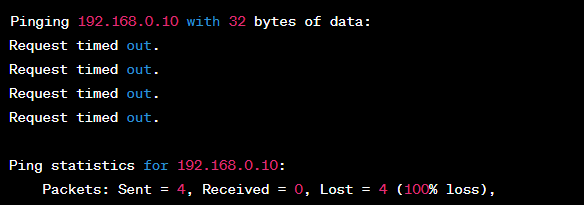
- This indicates that there may be a network issue preventing the workstation from reaching the server. Once the ping test is complete, you can analyze the results to determine if there are any network issues. If the ping test is successful, but you are still experiencing issues with accessing the server, you may need to troubleshoot further or seek assistance from a network administrator.
Method 7. Reboot the server and fix the QuickBooks multi-user error H202
Perform a Soft Reboot
If you want to perform a soft reboot of your server, you must be logged in to the server using a super user account or with the admin rights.
Use the following commands if you are using a Linux or Windows server to do a soft reboot of your server.
For Linux server use this command:
sudo reboot
For the windows server use this command:
- Open settings from the charms bar and then click on Power >> Restart.
- Click on the start menu to open it, now find the restart option next to the shutdown and click on it.
Alternatively, you can use the command prompt to initiate the soft reboot of the server. Type the following command in the window:
shutdown /r
Perform a Hard Reboot
If you can’t run multi-user mode in the QuickBooks or having issues with the server, do a hard reboot from the cloud control panel.
Note: Take a quick backup of your work or data as a hard reboot forcefully stops your working programs, resulting in a data loss.
- Log in to your Cloud Control Panel.
- From the top navigation bar, Hit a click on the Select a Product > Rackspace Cloud.
- Now choose the Servers > Cloud Servers, and then click on the gear icon to reboot the server.
- Choose the reboot option and next from the pop-up dialog box, click on Reboot Server.
When the reboot is complete, check your server if It is working fine or not, and also check if you are able to transfer the company files or not in a multi-user environment.
You can utilize QuickBooks Data Recovery Services to resolve the QuickBooks H202 Error.
An Additional option if you are using a Linux server
Update the QBGlobalAppConfig.ini file on the Fedora Linux Server
- Firstly, open the Linux Terminal Window and then access the QBGlobalAppConfig.ini file.
- Next, you have to check the Default range for ports and delete any kind of spaces before and after the equal symbol.
- If you have to get the complete list of ports then you can look into the Install Linux Database Server Manager.
- You can now save the QBGlobalAppConfig.ini file.
- End these steps by rebooting the QBDBFILEMON and QBDBMGRN services.
Final Thoughts: Addressing QuickBooks Error H202 and Connecting with Expert Help
We are confident that the troubleshooting steps and explanations provided above will help you address QuickBooks Error H202. However, if the error persists, please do not hesitate to contact our QuickBooks Data Service experts at our toll-free helpline number +1-888-538-1314. Our experienced professionals possess the knowledge and expertise to identify and resolve the issue effectively.
FAQ
Is there a way to prevent QuickBooks Error H202?
To prevent QuickBooks Error H202, ensure that the hosting computer is properly configured as a server and the firewall is configured to allow access to the company file. Additionally, ensure that the hosting computer is always turned on and connected to the network.
How can I tell if the hosting computer is set up as a server?
You can tell if the hosting computer is set up as a server by checking the QuickBooks Database Server Manager on the hosting computer. If the hosting computer is set up as a server, the Database Server Manager should be running.
What should I do if QuickBooks Error H202 continues to occur?
If QuickBooks Error H202 continues to occur, you should contact QuickBooks technical support for further assistance.
How can I check if the firewall is blocking access to the company file?
You can check if the firewall is blocking access to the company file by disabling the firewall temporarily and attempting to access the file. If the file can be accessed, the firewall is likely blocking access.
How can I configure the firewall to allow access to the company file?
The steps to configure the firewall to allow access to the company file will vary depending on the type of firewall being used. Consult the firewall’s documentation or contact the firewall’s technical support for assistance with this task.
