
Wondering to resolve QuickBooks crashing when sending emails through Outlook?
Outlook, a component of Microsoft Office, serves as a versatile email manager. Beyond merely sending messages, it can be connected with various Windows and online applications to enhance email functionality. One such integration is with QuickBooks Desktop, allowing users to send emails via Outlook directly from the Desktop app. However, if there are problems with Windows settings or compatibility issues, Outlook may experience freezing while sending emails from QuickBooks Desktop. This article aims to provide a comprehensive guide to resolving the error “QuickBooks Outlook is not responding” when attempting to send emails from QuickBooks Desktop. By reading to the end, you will learn the root causes and effective solutions for this error.

Is your QuickBooks showing the error code “QuickBooks Outlook is not responding”? You can either follow the subsequent troubleshooting steps to remove the emailing problem or let us troubleshoot by calling +1-888-538-1314.
Compatibility of QuickBooks Desktop Versions with Microsoft Outlook Versions
How the compatibility between different versions of QuickBooks Desktop and Microsoft Outlook could be represented in a table.
| QuickBooks Desktop Version | Compatible Microsoft Outlook Version |
|---|---|
| QuickBooks Desktop 2023 | Outlook 2019, 2021 |
| QuickBooks Desktop 2022 | Outlook 2019, 2021 |
| QuickBooks Desktop 2021 | Outlook 2016, 2019 |
| QuickBooks Desktop 2020 | Outlook 2016, 2019 |
| QuickBooks Desktop 2019 | Outlook 2013, 2016 |
| QuickBooks Desktop 2018 | Outlook 2013, 2016 |
Reasons for QuickBooks Outlook is Not responding error
There can be abundant grounds to crop-up emails not working in QuickBooks 2023. Still, we have written below the most common reasons.
- Damaged Mapi32.dll: This file is crucial for email functions. If it’s damaged or not in good shape, it can cause issues with sending emails from QuickBooks.
- Incorrect Email Preferences: If you’ve chosen incorrect email preferences in QuickBooks, it may disrupt the email functionality, preventing emails from being sent.
- Corrupted Windows User: A damaged or corrupted Windows user account can lead to various issues, including problems with sending emails from QuickBooks.
- User Privileges: The user account you’re using in QuickBooks may not have the necessary rights or permissions to perform email-related tasks.
- Incompatible Outlook Version: Using an incompatible version of Outlook can cause QuickBooks to freeze when it tries to connect for sending emails.
- Corrupted Transactions: If there are corrupted transactions in your QuickBooks company file, it may prevent QuickBooks from successfully sending emails.
- Outdated Operating System: Using an outdated OS like Windows 7, 8, or 10 may not be fully compatible with the latest version of QuickBooks, causing issues with email functions.
- Outdated QuickBooks Desktop Version: An outdated QuickBooks Desktop version may not support all features and functions, including email, leading to potential issues when trying to send emails.
Steps to surmount “QuickBooks Outlook Email not working”
Here are the steps you can follow to resolve the email issue in QuickBooks 2021/ 2022/ 2023.
Fix Email issues in Windows 7/10/11
STEP 1. Verify and set the email preferences for QuickBooks
- To begin, launch QuickBooks, and after it’s open, select the “EDIT” tab from the menu that appears.
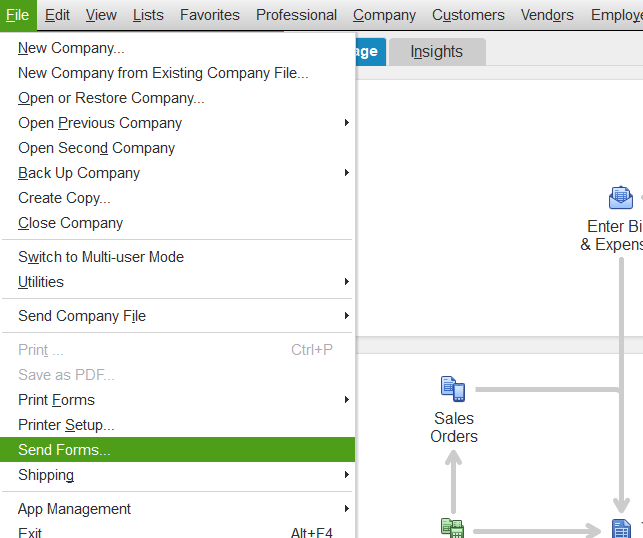
- From the list of settings that are accessible, select “Send Forms.”
- Now, navigate to the “My Preferences” tab and choose the “Send Email” option from the drop-down menu that appears.
- Clicking OK will take you to the next step.
- Click “Edit” again, and then select “Preferences” from the drop-down menu that appears.
- After making your selection, navigate to the “My Preference” tab of the menu that appears.
- After entering the data, click on the QuickBooks icon, and then select the “OK” button.
- Select the “Edit” menu option, then click the “Preferences” button.

- Choose Outlook, then click the OK button on the toolbar.
- Now, close the QuickBooks application and launch outlook by clicking there.
- You will need to restart your PC before making another attempt to send an email using QuickBooks.
STEP 2. Make sure QuickBooks is running in the admin mode
- Select Properties from the context menu that appears after you right-click the QuickBooks Desktop icon located on your Windows Desktop.
- To run a program with administrative privileges, go to the Compatibility tab and make sure the Run this Program as Administrator checkbox in the Privilege Level section is checked.
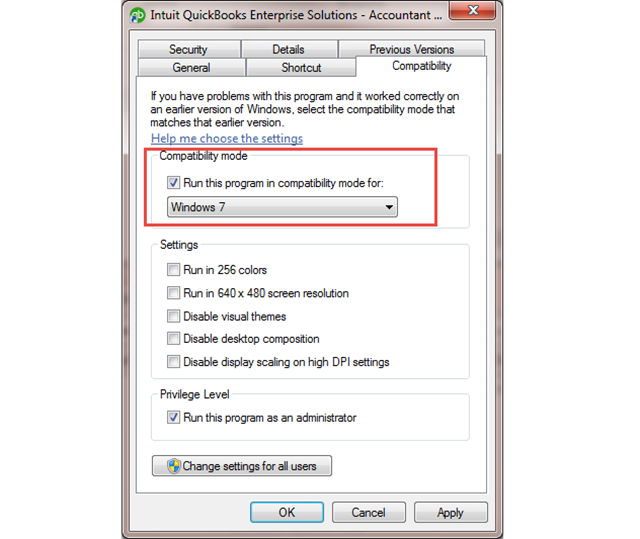
- Click the Apply button, and then select OK if the choice is already selected.
- You should try restarting your computer and seeing if it fixes the issue.
STEP 3. Fix the corrupted MAPI32.dll file
Are you seeking a solution in fixing the problem if QuickBooks and Outlook do not respond to each other? You can proceed by following the steps that are stated below:
- To begin, you will need to end any applications that are now active on your Windows computer.
- Now, launch the Window File Manager application and navigate to the C:\ Windows\ System32 folder.
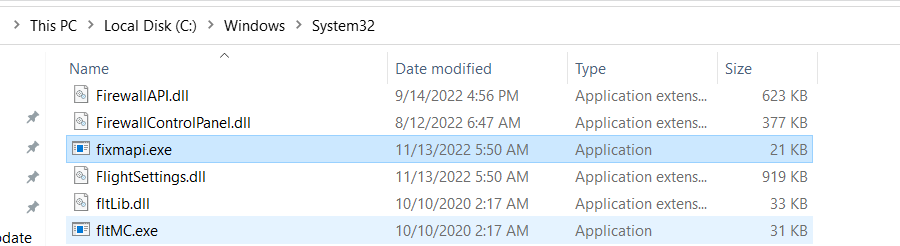
- The next step is to locate the file named Fixmapi.exe and then double-click on it.
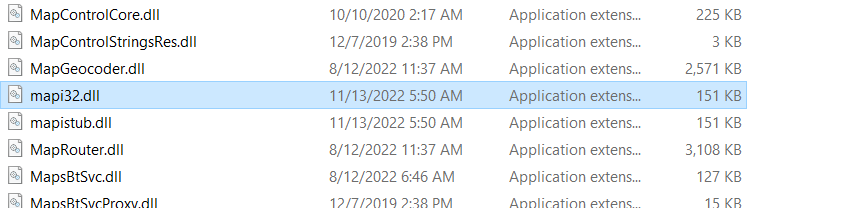
- Once the tool has located the MAPI32.dll file, you will need to navigate to QuickBooks and then attempt to send an email in order to check the status of the QuickBooks Outlook is not responding.
STEP 4. Configure Firewall and Antivirus Settings
Sometimes, your firewall or antivirus software may block the communication between QuickBooks and Outlook. If you’re facing issues with sending emails from QuickBooks via Outlook, you may need to temporarily disable or adjust the settings of your firewall and antivirus software. Here’s a step-by-step guide to do this:
Please remember that adjusting firewall and antivirus settings may expose your system to threats. Proceed at your own risk.
- Disable your Firewall temporarily:
- Step 1: Click the ‘Start’ button and type ‘Firewall’ in the search box.
- Step 2: Select ‘Windows Defender Firewall’.
- Step 3: On the left-hand side, click on ‘Turn Windows Defender Firewall on or off’.
- Step 4: Check the boxes for ‘Turn off Windows Defender Firewall (not recommended)’ under both ‘Private network settings’ and ‘Public network settings’.
- Step 5: Click ‘OK’ to save the changes.
Remember to turn the firewall back on as soon as you finish the task in QuickBooks to protect your computer.
- Disable your Antivirus temporarily:
Note: The following steps are generic, as different antivirus software may have different settings.
- Step 1: Find the antivirus icon in your system tray (usually in the bottom-right corner of your desktop).
- Step 2: Right-click on the antivirus icon.
- Step 3: Look for an option that allows you to disable the antivirus. This option may vary; it could be ‘Temporarily disable protection’, ‘Disable Antivirus Shield’, etc. Click on this option.
- Step 4: Usually, you can select the duration for which you want to disable the antivirus. Choose a suitable time frame, but remember to re-enable it once you’re done with your QuickBooks task.
After disabling both the firewall and antivirus, try sending the email from QuickBooks again. If it works, you’ll know that the issue was due to the firewall or antivirus software blocking the communication between QuickBooks and Outlook. Remember to re-enable your firewall and antivirus once you’re done.
STEP 5. Downloading and using Microsoft Support and Recovery Assistant
System requirements to download SARA
- You should only use the following operating systems: Windows 11/10/8/8.1/7.
- Should have at least .NET Framework 4.5 installed.
- The following versions of the MS Office should be used: 365/2019/2016/2013/2010.
Downloading and installing Microsoft SARA (Support and Recovery Assistant)
- If you want to download the Microsoft SARA tool for Windows 10/11, you have to go to the official Microsoft Download Center in your browser and visit Microsoft Support and Recovery Assistant download page. Click on the red button to download and save the SARA package to your computer.
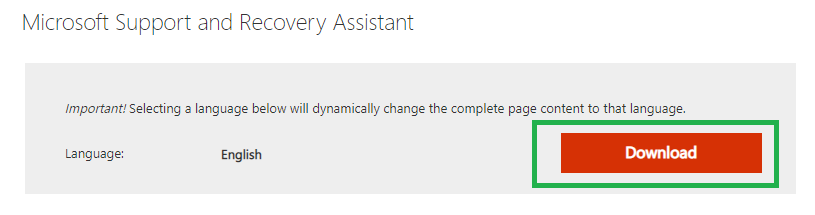
- You can also choose an alternative way and visit the Microsoft Support and Recovery Assistant official website and hit the download button you can see under Installing Microsoft Support and Recovery Assistant section to download this tool.
- If you have downloaded the tool from the first link then you have to unzip the SARA file and then install it by running the SaraSetup application. If you have downloaded the SARA tool using the second link then click on the SaraSetup.exe file to install it. Next, follow the ongoing instructions displayed on the screen to install the SARA tool on your Windows 10/11 computer.
Now use the Microsoft Support and Recovery Assistant (SARA)
- Launch the Microsoft Support and Recovery Assistant tool on your system.
- Now select the outlook from the following displayed apps and then click next.
- Next, select the problem you are having with your outlook and click on Next.
- The Microsoft SARA tool will start a diagnosis and check for the possible problems in the outlook. If it can’t find any issues then you will get the desired feedback.
- In the feedback window, click on submit option and then open the log file folder. You can find the SARA log files in the AppData -> Local folder of your user account.
STEP 6. Use Webmail and send emails from QuickBooks
QuickBooks provides users with two different options for sending emails. You have the option of using either Outlook or webmail. If for some odd reason, Outlook is not functioning in QuickBooks, you can utilize your webmail to send emails from within QuickBooks instead of using Outlook.
- In QuickBooks go to the edit tab and then choose preferences.
- You can see the send forms from the left pane, click on it, and then choose the My Preferences tab.
- Now go to the Send Email Using section and choose the WebMail Providers (Gmail, Yahoo, etc.) option.
- Next hit the Add button and fill in all the necessary information to add your email account.
- Then click on OK to save the email info and click on OK again to change the email preferences.
- Try to send an email now and check whether you are getting any issues or not.
STEP 7. Re-install QuickBooks using Clean Install Tool
Note: Before you begin implementing this step, we strongly recommend that you write down the License number and Product ID for the version of QuickBooks that you are now using.
- To begin, you need to exit all of the applications and programs that are now running.
- The next step is to launch the Task Manager and check that all QuickBooks processes have been terminated before continuing.
- After that, you will need to rename all of the QuickBooks apps and program files by downloading the QuickBooks Clean Install Tool and then running it.
- It is necessary for you to restart your computer at this time.
- Additionally, you are required to rename the remaining folders manually.
- After that, you should remove QuickBooks and then restart your computer.
- Before moving forward, you will need to either install QuickBooks using a CD containing the installation software or download it from an online source. After you have completed the installation, you will be prompted to input your product ID and license number.
- After the QuickBooks software has been reactivated and the installation procedure has been completed, you will need to update both the application and the company file.
- In conclusion, you should send an email to see if your problem has been resolved or not.
If the provided solutions do not have any effect on your QuickBooks Freezing when trying to connect to Outlook then you can also move on to these additional solutions that are system specific.
STEP 8. Start the outlook in safe mode
In the event that Outlook stops responding while on a screen that reads “Processing,” you can fix the issue by quitting Outlook, starting it up in safe mode, quitting it again, and then opening it normally.
- Close the Outlook app.
- You can launch outlook in safe mode using these three options:
- In the windows 10 click on the windows icon and type Outlook.exe/safe and hit the enter key.
- You can also do the same thing with the other version of the windows and launch the outlook in safe mode.
- Now close the outlook app and then try to open it again with the QuickBooks.
STEP 9. Repair your Outlook data files
An Inbox Repair Tool (SCANSPST.EXE) is also installed on your personal computer when you install Microsoft Office. The Inbox Repair Tool can fix problems by inspecting the data files in your Outlook client and corrects any faults that it finds.
If you want to use the Inbox repair tool, first close the outlook and then go to the repair outlook data files (.pst and .ost).
- First, go to the following locations of the files:
- Outlook 2019: C:\Program Files (x86)\Microsoft Office\root\Office16
- Outlook 2016: C:\Program Files (x86)\Microsoft Office\root\Office16
- Outlook 2013: C:\Program Files (x86)\Microsoft Office\Office15
- Outlook 2010: C:\Program Files (x86)\Microsoft Office\Office14
- Outlook 2007: C:\Program Files (x86)\Microsoft Office\Office12
- Now open this exe file SCANPST.EXE.
- Next, choose the browse and select the .pst file that you would like to scan.
Note: while the scan is running, a brand-new log file will be generated automatically. You have the option of selecting Options and selecting “Do not generate a log,” or you have the option of selecting “Append results to an existing log file.”
- Now hit on the start to begin the scan.
- If the scan founds any issues then click on the repair button to start the process and fix the errors.
Note: while the repair is being done, the scan will make a backup file for you. Enter a new name for this backup file in the box labeled “Enter name of backup file,” or choose to Browse to locate and pick the backup file you wish to use. Changing the default name of this backup file will also alter its location. It is possible that in order to repair your Outlook Data File, you will need to run the tool more than once. If an item has been erased permanently or its data has been corrupted beyond repair, it is possible that it cannot be recovered.
- When the repair is finished start the outlook app with the profile that is linked to the outlook data file you currently repaired.
Step 10: Navigating Add-ins within Microsoft 365 for QuickBooks Outlook
Add-ins can power-up your Microsoft 365 applications, introducing custom commands and extra features that elevate your productivity. However, given the potential security risks that some add-ins can pose to your computer, managing your add-in security settings prudently is critical.
Note: The guidelines below are specific to Microsoft 365 applications running on Windows.
Inspecting Installed Add-ins:
- Go to File > Options > Add-Ins. Here you’ll find all the add-ins installed.
- For detailed insights about each add-in, simply hover over them. This action presents vital information such as the add-in’s name, publisher, compatibility, its storage location on your device, and a brief on its functionalities.
If you wish to delve deeper into add-ins, explore topics like “Add-in categories explained“, “Permanent disablement or removal of an add-in“, “Adjusting add-in settings“, and “Understanding add-in settings“.
Should you encounter problems, like an add-in crash, look up “Why is my add-in crashing?” for guidance.
For specialized assistance on specific add-ins for Microsoft 365 applications such as Outlook, Project, or Excel, seek resources like “Obtain a Microsoft 365 Add-in for Outlook” or “Acquire a Microsoft 365 Add-in for Excel”. If you’re attempting to link notes in OneNote to a Word or PowerPoint document, “Take linked notes” would be a beneficial guide. For specific Excel Add-ins, like Solver or Inquire, consider using “Help for Excel for Windows add-ins”.
Fix Email issues on Mac
STEP 1. Reset your outlook account
If you continue to have this issue despite the fact that both your Mac and Outlook are linked to a reliable network, you should think about resetting your account. In order to accomplish this task, you will need to remove your account from Outlook and then re-add it later.
- Open the outlook application and then go to the tools and next to accounts.
- Now navigate to the account settings and choose the account that you wish to remove.
- Next, click on the delete button and confirm that you want to remove this account.
- Again launch the outlook and then add the account details to reset it.
STEP 2. Boot Mac in Safe Mode
In the event that there is a problem with a component of the Mac’s network or security system that is preventing Outlook from functioning, you should instead boot it up in the safe mode.
- Shut down all the actively running apps and then restart your system.
- Keep pressing and holding the Shift key for a few moments, and then let go of it after the Mac has started up in safe mode.
- Now login into your user account and start the outlook in safe mode.
STEP 3. Run Outlook Diagnostics
On a Mac, each data record is stored independently, in contrast to Windows, which uses OST files to store Outlook data. Because of this, the presence of numerous records in the system can occasionally result in an undesirable conflict. If you’re having trouble, you might want to try removing unnecessary records from your Mac.
- Close the outlook and then go to the finder.
- Navigate to the following location: ~/Documents/Microsoft User Data/Office 2011 Identities/Main Identity/Data Records/Messages.
- Now carefully go through the records and remove the content that you do not require.
- Once this process is completed, launch outlook again and check whether it works fine or not.
Summing up
This article has provided a comprehensive range of solutions for when QuickBooks is unable to send emails through Outlook. Despite this, you may still encounter scenarios that require expert help. If you’re unable to resolve the QuickBooks Outlook is not responding, feel free to contact our support team for immediate assistance. You can reach us by calling our QuickBooks Data Service Toll-Free Helpline at +1-888-538-1314. We’re here to ensure QuickBooks works effectively for your business needs.
FAQs on QuickBooks Outlook is not responding
Q: QuickBooks freezing when emailing through Outlook, what to do?
A: The freezing issue may occur due to outdated QuickBooks, email setting conflicts, or a need to repair your QuickBooks installation. Ensure your QuickBooks is updated and check the email preference settings.
Q: QuickBooks won’t send emails, how to fix?
A: If QuickBooks is not sending emails, it could be due to incorrect email settings, outdated QuickBooks software, or internet issues. Check and correct your email settings, update QuickBooks, and ensure your internet connection is stable.
Q: QuickBooks Desktop freezes while sending email, what’s the reason?
A: Compatibility issues between QuickBooks and your OS or email client could cause this. Check if QuickBooks is compatible with your OS and update your QuickBooks and email client.
Q: QuickBooks Desktop can’t send emails to Outlook, what to do?
A: This may be because of incorrect email settings in QuickBooks or issues with your Outlook installation. Review and correct your email settings in QuickBooks, and consider repairing or reinstalling Outlook.
Q: QuickBooks MAPI repeatedly asks for an Outlook password, how to solve this?
A: This is often due to issues with saved login credentials in QuickBooks or Outlook or a faulty MAPI32.dll file. Re-enter your email password in QuickBooks or consider repairing the MAPI32.dll file.
Q: What could be the reason for QuickBooks crashing when sending emails?
One common reason QuickBooks keeps crashing when emailing invoices could be due to compatibility issues with the email client, outdated software, or corrupted QuickBooks files. Ensuring software updates and proper configurations can help mitigate this problem.
